Showing posts with label mixed media. Show all posts

Tuesday, April 21, 2020

Happy Hands art journal page - inspired by a Vera Lane Studio image


Hi everyone! Yesterday marked the new release of the Stitches digi set at Vera Lane Studio. Oh my word, I love these images. I have been sewing since my early teens and think these are the cutest images. I immediately thought of my friend, Jane, who is an avid and talented quilter. I chose to combine two of the images, the girl with her eyes blissfully closed and the spool of thread, to star on my art journal page today.


I coloured both images with a mix of Prismacolor and Polychromos pencils, fussy cutting each leaving a narrow white border. I then glued the images together where they overlap and matted them with black cardstock. The new "merged" image was fussy cut again leaving the narrow black border. White Posca paint pen was used to add the little design on her outfit.


I wanted a quilted background for the 6x6 watercolour page but I also wanted vibrant colours. Three Distress Oxide Inks (Peacock Feathers, Cracked Pistachio, Wilted Violet) were added one at a time to a small gel plate and spritzed with water. Using a waterbrush, the colour was then added to the appropriate squares in the 9-patch design. Stencils were added over each square and the ink was removed using a baby wipe. On a few of them, the design was too small for this to be effective so I sponged through the stencil openings with white gesso. I wanted the texture and to break up the solid colour. The lines dividing the patches and the faux stitching along the lines was doodled with black pen. I love how that turned out!
The wording was printed onto white cardstock, matted with black. The saying, which I have always felt to be true, seemed to suit her expression of crafter's bliss. To ground her, a strip of zigzag cardstock was fussy cut and placed below the thread. I thought it looked like rickrack. Three enamel dots were added to the top left corner to add another pop of black and balance the design.

Thanks for stopping by today. You can check out Stitches as well as a plethora of fabulous and inspiring images in the Vera Lane Studio Etsy shop. We would love to have you drop by the Vera Lane Studio Facebook group to say hi. There is always wonderful inspiration and friendly chats happening there.

Life is good; so is art.
Bonnie


Tuesday, April 14, 2020

Practice Kindness Artist Trading Card - inspired by a Vera Lane Studio image


Hi everyone! While I was on the Kindness theme from my art journal page posted earlier today, I decided to create an artist trading card as well. I used Prismacolor and Polychromos pencils to colour one of the images from the (available upon request) Back to Back set by Vera Lane Studio which is also available as a pre-coloured collage sheet. The background was created as a mop-up card when I was creating the background for my Kindness post card. I added some black circles drawn using a circle template and a piece of washi layered over black to ground her. A little black faux stitching and black Big Brush pen were used to finish the edges and frame the card.

Thanks for stopping by today. Be sure to pop by the Vera Lane Facebook group to say hi and the VLS Etsy shop to check out the fabulous images there.

Life is good; so is art.
Bonnie

Kindness is a Gift - inspired by a Vera Lane Studio image


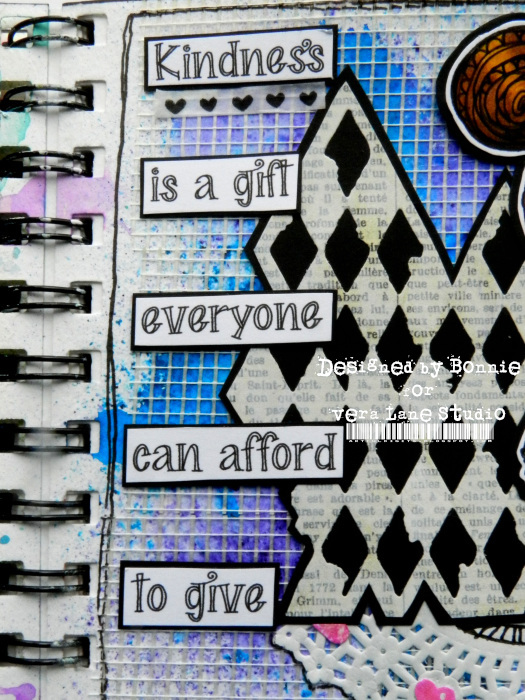
Hi everyone! We have a Kindness post card challenge going on this month on the Vera Lane Studio Facebook group. With the kindness theme in mind, I created an art journal page, hoping to inspire people thinking about playing along. I chose to feature one of the images from Be You by Vera Lane Studio as the focal image for this page, colouring her with a mix of Prismacolor and Polychromos pencils. She was then fussy cut leaving a narrow white border, and matted with black cardstock to create a second border.


The background started with Turquoise and Violet Brushos being sprinkled onto watercolour paper, and then spritzing them with water to activate the pigments. The background was then covered with 3 strips of drywall mesh to tone down the brights. A vintage book page was die cut  using a Tim Holtz die and fussy cutting next to the pattern. It was then matted with black and fussy cut again. A doily was tucked behind the die cut to ground it as well as the image.


The wording was printed onto white cardstock, cut into sections, and matted with black cardstock.


Tiny pink hearts were added to the doily and a little doodling, including a page border, and outlining were added with black pen. To create a better balance and create a diagonal flow, two strips of black cardstock were cut into fishtail flags and added to the bottom right corner. White washi tape with black hearts was adhered to white cardstock to help the pattern stand out, and then layered over the flags as well as under the word kindness.

Thanks for popping by today. We would love to have you join our Kindness Post Card Challenge on the Vera Lane Studio Facebook group. You can find fabulous images in the Vera Lane Studio Etsy shop or you can use Janet's stamps from AALL & Create. Come up with a design that connects to the theme of Kindness and post your photo in the album. Easy Peasy!

Life is good; so is art.
Bonnie

Tuesday, April 07, 2020

Uniquely Me - inspired by a Vera Lane Studio image


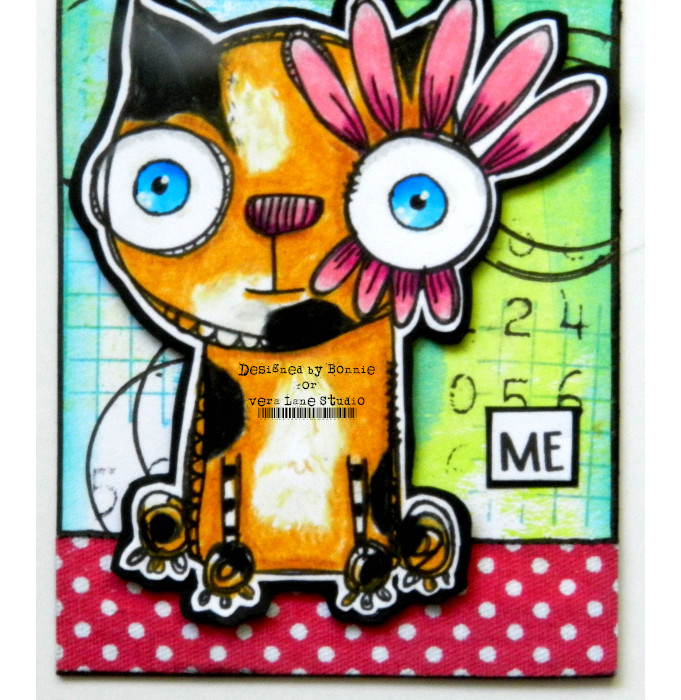
Hi everyone! Because I love the new release by Vera Lane Studio called Cat and Canary so much that I created two projects for today. I did the art journal page posted earlier using the standing cat and the canary but I couldn't resist the sitting cat. I made an artist trading card  so she could have her own stage. I coloured Cat to look like a calico cat using Prismacolor and Polychromos pencils. I love her flower eye...so cute! She was fussy cut leaving a narrow white border, matted with black, and fussy cut a second time leaving a narrow black border.


The background was cut at 2.5 x 3.5 inches from a previously created gel printed paper where I had used acrylic paint. Circles were added with a black pen and a circle template. The grid stamping was done with Forget-Me-Not Archival Ink and a VLV stamp. A VLV number stamp was also applied to the background using Jet Black Archival. To pull the pink from her flower and nose, a length of dotty fabric washi was adhered along the bottom edge, grounding her. Black Big Brush pen was used to edge the card before Cat was added popped up on foam tape.

Thanks so much for visiting today. You can check out the Cat and Canary image as well as all of the other wonderful images at the Vera Lane Studio Etsy shop. We would also love if you popped by the Vera Lane Studio Facebook group where we have a fun Kindness Postcard challenge going on for the month of April. Hope to see you there!

Life is good; so is art.
Bonnie

I promise...inspired by a Vera Lane Studio image


Hi everyone! Yesterday marked another fabulous new release at Vera Lane Studio. The image set called Cat and Canary has 3 of the cutest images plus two awesome sayings. For this art journal page, I combined the standing cat and the canary, stacking them because they are buds.


Cat and Canary were coloured with Prismacolor and Polychromos pencils. They were fussy cut leaving a narrow white border, matted with black cardstock, and fussy cut again leaving a narrow black border.


The background is crazy busy! After priming the page with a layer of white gesso, Wilted Violet and Peacock Feathers Distress Oxides were loaded onto a small gel plate, one at a time, and then spritzed with water before being smushed onto the page several times. Once dry, the Peacock Feathers Distress Oxide Ink was added through Carabelle Studio Weft Fabric and Numbers Stencil in several places. Both a 49 & Market Chevron stamp and a VLV numbers stamp were added to the background. To bring back some white and calm down the colour, three pieces of white cardstock were torn, stamped with Jet Black Archival Ink and a Wendy Vecchi stamp, and then edged with Twisted Citron D.O.and Jet Black Archival Inks.


The wording was printed on white cardstock and matted with black. The cat was grounded with three lengths of washi tape overlapped. Three small hearts colorized with the three Distress Oxide Inks were placed to tie the white pieces to the background. A doodled border and outlining were done with a black pen before Black Big Brush pen was added to the page edges to frame it.

Thanks for joining my two friends and me today. It made us all happy. You can check out the Cat and Canary image as well as all of the other wonderful images at the Vera Lane Studio Etsy shop. We would also love if you popped by the Vera Lane Studio Facebook group where we have a fun Kindness Postcard challenge going on for the month of April. Hope to see you there!

Life is good; so is art.
Bonnie

Tuesday, March 24, 2020

Hello Spring artist trading card - inspired by Vera Lane Studio images


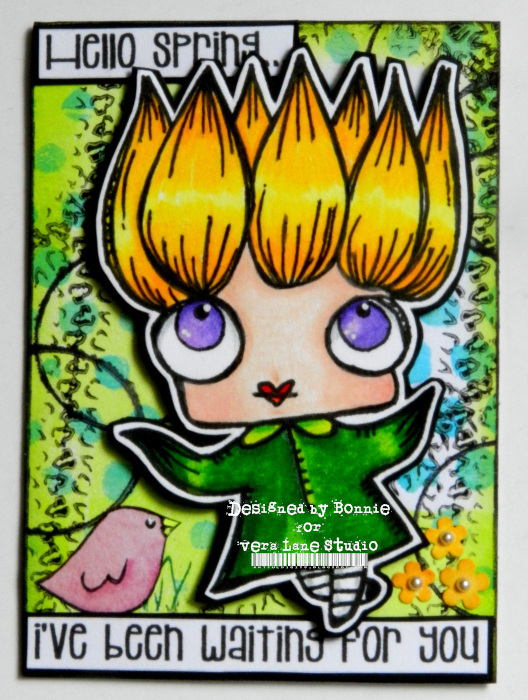
Hi everyone! We had a Hello Spring Swap which has now become a Hello Spring Challenge going on in the Vera Lane Studio Facebook group. I have created a fun little card featuring two Vera Lane Studio images as a kind of inspiration piece for the Challenge since the DT are not eligible for the prize. I used one of the Fleur Fairy images as well as a bird from the Birdy set.This image is called FairieFleur and she was coloured with a mix of Prismacolor and Polychromos pencils before she was fussy cut leaving a narrow white border. She was then matted with black cardstock and fussy cut a second time leaving a narrow black border. Foam tape was added to the back to pop her up off the background. The tiny bird was printed onto a scrap of pink patterned paper and shaded with a waterbrush loaded with Inktense pencil.


The ATC background, which is 2.5x3.5 inches, was cut from a gel printed paper. The black tracks were created by running a toy car through black paint and then printing the design on the gel plate (so fun!) Jet Black Archival ink was used to stamp the rings. Three tiny flowers were punched from yellow paper and inked with  a deeper yellow to shade the petal edges before a tiny peatrl was added to each center. The saying was printed onto white cardstock, matted with black. Black Big Brush Pen was used to edge the card creating the look of a frame.

Thanks for joining Fairie Fleur, her bird friend, and me today. We appreciate that. Be sure to pop by the Vera Lane Studio Etsy shop to meet all of Fleur's other friends. They will keep you distracted and creative in this difficult time. Come by the Vera Lane Studio Facebook group to say hi and see all of the gorgeous Hello Spring Challenge entries. We'd love to have you play along, too.

Life is good; so is art.
Bonnie

Tuesday, March 17, 2020

Alice will decide - inspired by a Vera Lane Studio image


Hi everyone! Oh my word, did you see the new release by Vera Lane Studio yesterday? It's called Alice and White Rabbit and I am smitten! I love anything Alice in Wonderland but these two are absolutely adorable.I decided to create with them one at a time and today it's Alice's turn.


I coloured Alice with my usual mix of Prismacolor and Polychromos pencils. Tiny pearls were added as buttons on her dress before she was fussy cut leaving a narrow white border. Alice was matted with black cardstock and fussy cut a second time leaving a narrow black border to help her stand out against whatever background I created. You know me...there's never a plan :)


I first added a layer of white gesso to the watercolor paper background because Distress Oxide Inks behave differently on gesso and it's fun to change it up. Salty Ocean and Squeezed Lemonade Distress Oxide Inks were applied to the background blending to a pretty green where they overlapped. Carabelle Studio Weft Fabric and Numbers stencil was laid over the now dry Distress Oxide and a baby wipe was used to remove the colour through the holes. Once dry, a Viva Las Vegas stamp was applied loosely using Manganese Blue Archival Ink and no block. A strip of black and cream dotty paper was glued across the bottom of the page to ground Alice. Before she was adhered to the page, a small version of a AIW page, A TH A card, and an Alice Tea Party ticket were inked with Coffee Archival and layered to form a collage with her as the focal.


The quote from Lewis Carroll's Alice was printed onto white cardstock and matted with black. A strip of checked washi was added under the first sentence to add emphasis. A tiny rub-on was added to the left of Alice's legs and two black enamel dots accented the sides of the dotty strip. To finish the page, a black border was doodled around the edges which were then edged with black Big Brush Pen to create a frame.

Thanks for joining Alice and me today. We are delighted you did that. When you get a chance, check out the Alice and White Rabbit set in the Vera Lane Studio Etsy shop and be sure to return on Wednesday this week...just sayin'. We would love to have you join us on the Vera Lane Studio Facebook group where this week you are sure to see more inspiration from this set. We have an ATC swap going on for March with the theme of Spring that we'd love to have you join as well.

Life is good; so is art.
Bonnie

Tuesday, March 10, 2020

Ladies' Faces ATCs - inspired by Vera Lane Studio images


Hi everyone! For my second DT post today, I decided to play with two more of the four Ladies' Faces digi stamps from Vera Lane Studio. I absolutely love this set, having already created an art journal page with one of them when it was first released. Three down...one to go.LOL This time I decided to create two artist trading cards.


The ladies were coloured with Prismacolor and Polychromos pencils, fussy cutting them leaving a narrow white border, and a second time leaving a narrow black border. Foam tape was used to pop them up once they were adhered to the backgrounds.


The cards themselves were cut from thin chipboard covered with scraps left from a  background making session done at an earlier time. As near as I can tell, they are mainly Lindy's Starburst sprays mopped up with white cardstock. Stamping and stencilling with Jet Black Archival, as well as Texture Paste, and gesso rings were added to the cards. To ground the two ladies, a strip of checked washi tape adhered to white cardstock was added to the bottom of each card. The words are Chit Chat Stickers matted with black and popped up with foam tape. Black Big Brush pen was used to darken the outside edges, both to frame the cards and to disguise the layers of different papers.

Thanks for joining the Ladies and me today. When you get a chance, pop by the Vera Lane Studio Etsy shop to meet all of their friends. We'd love to have you join us on the Vera Lane Studio Facebook group as well. There is always something new to inspire you and the company is wonderful :)

Life is good; so is art.
Bonnie

Wink ~ inspired by a Vera Lane Studio image


Hi everyone! Wow! Full moon, time change, and Friday 13th all in the same week...that's a challenge but no worries...this sweet image from the Daisy and Wink set by Vera Lane Studio has a wonderful strategy for dealing with all three and she's sharing it today on an art journal page.


I coloured Wink with Prismacolor and Polychromos pencils, fussy cutting her to leave a narrow white border. She was then matted with black cardstock and fussy cut a second time leaving a narrow black border which helps her stand out against any background.


Colour was added to the 6x6 inch watercolour paper with Picked Raspberry and Squeezed Lemonade Distress Oxide Inks. Jet Black Archival Ink was sponged through AALL & Create Lotza Dotz stencil with white Posca Paint Pen dots added inside some of the circles and black pen added as messy outlines. |A Viva Las Vegas background stamp was applied in a few places using Magenta Hue Archival Ink. The same ink was used to stamp some script to add more texture. Black gesso lines were added with a gift card once the two strips of washi were adhered to ground Wink.


The wording was printed onto white cardstock, matted with black. Once it was in place and Wink was situated, pieces of drywall mesh were added to add still more texture in three places. A die cut star topped with a threaded button and matted with black cardstock was adhered to the top left corner to balance the design. The page was finished by edging the page with Neocolor II crayon activated with a waterbrush, as well as a doodled border and black Big Brush pen to darken the page edges.

Thanks for joining Wink and me today. You can find Daisy and Wink as well as a plethora of other fabulous images in the Vera Lane Studio Etsy shop. Pop by the Vera Lane Studio Facebook group for more inspiration. We have a Spring ATC swap going on for the month of March and would love to have you join us.

Life is good; so is art.
Bonnie

Tuesday, March 03, 2020

There is no tri - art journal page inspired by a Vera Lane Studio image


Hi everyone! I have a fun journal page featuring one of the new Dinos images released yesterday by Vera Lane Studio. All three of these guys are so cute. I chose the triceratops to combine with Yoda from the Princess Leia and Yoda set so that I could use this pun-tastic sentiment. It made me laugh and suited these two perfectly.


I coloured Yoda with a mix of Prismacolor and Polychromos pencils. Ceratops was printed onto pink dotty cardstock and shaded with the same pencil brands. His spots were done with a black Pitt pen and his eye white with a Posca paint pen.


Both Yoda and Ceratops were fussy cut leaving a narrow white border, fussy cut, and matted with black cardstock. The black was then fussy cut to leave a narrow black border.


The paper in this journal is 6x6 inch watercolour paper. The top section was spritzed withHeidi Swapp Ocean Color Shine and the bottom with Patina. Painter's tape was used to mask off the area not wanted each time. Lucky Clover or Faded Jeans Distress Oxide was sponged through TCW Plaid Fringe stencil depending on whether \i was on the blue or green section. Jet Black Archival was used to stamp a VLV grid pattern and French Ultramarine was used to stamp Ellen Hutson Bokeh circles. Because I wanted bright white little circles and anything wet would pick up the Color Shine colours, I punched .25 circles from cardstock and adhered them in clusters. They were outlined with black pen and then shaded with Inktense pencil plus water. To separate the grass from the sky and ground Ceratops and Yoda, a black and white sticker was placed along the dividing line. Black gesso lines were added to the page with a gift card.


The saying was printed onto white cardstock and matted with black. Two labels from a Tracie Fox download were added after the word triceratops was printed from the computer. Pink pencil crossed out the tri as per Yoda's wishes. To finish the page, a black photo corner was added to the upper right, a wiggly border was doodled, and black Big Brush pen pluse French Ultramarine Archival ink were added around the page edges.

Thanks for joining Ceratops, Yoda and me today. We love that you did! To check out the new Dinos release as well as the other awesome digi images and collage sheets, be sure and pop over to the Vera Lane Studio Etsy shop. You can also see all kinds of inspiring projects by the VLS team and our wonderfully talented Facebook group members if you come by the FB group for a visit.

Life is good; so is art.
Bonnie


Tuesday, February 25, 2020

Contessa ATCs - inspired by a Vera Lane Studio collage sheet


Hi everyone! I love working small so every once in a while I want to satisfy that craving with ATCs or ATCoins. The collage sheets available in the Vera Lane Studio Etsy shop are ideal for those times because the images are sized perfectly and they are beautifully coloured. I chose two of the images from the Contessa Collage Sheet to star on two separate ATCs. I added a little pencil shading to the images (not that they need it) to add my own voice to them and then fussy cut them once leaving a white border and once after I matted them with black cardstock.


The backgrounds come from a stack of scraps from previous gel printing or spraying adventures. I like to have a bunch of backgrounds pre-cut in either ATC (2.5x3.5 inches) or Coin (2.5 inch diameter circle) size and then I can add detail when I choose the focal later on. I then add stencilling, stamping, Texture Paste, washi or extra scraps to make the backgrounds interesting. Often I doodle and add black Big Brush Pen to the edges to frame the card.

Thanks for visiting the Contessas and me today. We appreciate that. When you get a chance, pop over to the Vera Lane Studio Etsy shop to see all of the other collage sheets as well as the fabulous digi images ready to colour and make your own. Stop by the Vera Lane Studio Facebook group and say hi while you clicking about. We're a friendly group :)

Life is good; so is art.
Bonnie

I am enough ~ inspired by a Vera Lane Studio image


Hi everyone! The beautiful images in the Ladies' Faces digi set released by Vera Lane Studio last week are so inspiring. I can't wait to play with all of them but I had to choose only one for today's art journal page. I decided on the Cake Topping one (CT) because I wanted to go light and bright an I felt that she was celebrating the saying.


I coloured CT with a mix of Prismacolor and Polychromos pencils, allowing the cake to remain white with gray shading because that suited the background of the page better than a colour would have. CT was fussy cut leaving a narrow white border, matted with black, and fussy cut leaving a narrow black border.


The 6x6 watercolour paper background was stencilled all over with Carabelle Studio For the Love of Layers stencil applying colour with Mowed Lawn and Mermaid Lagoon Distress Oxides. More stencilling was added with TCW Tiny Circles and Jet Black Archival before adding Ellen Hutson Bokeh Circles stamp with the same ink. An Indigo Blu script stamp was applied in a few places with Manganese Blue Archival ink.To break up the stencilled background, vintage book paper was torn and adhered in three places. The text was knocked back with white gesso and once dry, the two colours of Distress Oxide were added over that. Green and Blue Gelatos were added and spread with my fingers to deepen the colours toward the bottom of each text section. Tiny Xs were doodled over those text pieces for extra detail and interest.


Before CT was adhered to the page, two pieces of Dylusions Dyary borders were placed behind her neck to ground the image.The saying was printed onto white cardstock, cut into sections, and matted with black cardstock. A simple border was doodled around the outside of the pages which were also inked with Mermaid Lagoon DO. To finish off the page, three stars from the same Dylusions sticker set were added to the top of the page, and another to the bottom left.

Thanks for joining CT and me today. We love that! When you get a chance, be sure to stop by the Vera Lane Studio Etsy shop as well as our VLS Facebook group. There is so much to see, and inspiration galore in both places.

Life is good; so is art.
Bonnie

Tuesday, February 18, 2020

Vera Lane Studio ATC Swap


Hi everyone! There is a fun artist trading card swap going on right now in the Vera Lane Studio Facebook group. The theme is Things With Wings and not only can we use the Vera Lane Studio digital images but we can also use the adorable rubber stamps that Janet Klein designed for AALL & Create.


I chose this sweet bee image from the Pixie Dust set to star on my ATC. Love her to bee-its! I coloured her with a mix of Prismacolor and Polychromos pencils, and fussy cut her leaving the narrow white border. Then she was adhered to black cardstock and fussy cut leaving a narrow black border before she was popped up on foam tape.


The background started as a piece of vintage book paper which was used to mop up yellow and rust Lindy's sprays. A hexagon stamp was inked with the same watery mixture and applied behind where the bee would be placed. A scrap of cardstock spritzed with the same colours was matted with black and adhered along the bottom of the card. The black honeycomb die cut from Tim Holtz was trimmed around and adhered to the top and right side of the card. Inktense pencil activated with a water brush was used to shade inside the openings and next to the bottom edge of the die cut piece. Small circles were doodled onto the plainer part of the background before the words were added with foam tape. Three enamel dots finished off the card.

Thanks for stopping by today to visit with Bee and me. We hope that you will be inspired to play along with this fun swap on the Vera Lane Studio FB page. It's open to join in the fun until February 25. Check out the huge selection of digi stamps at the Vera Lane Studio Etsy shop or the sweet selection of Janet's stamps from AALL & Create.

Life is good; so is art.
Bonnie

Selectively Social ~ inspired by a Vera Lane Studio image


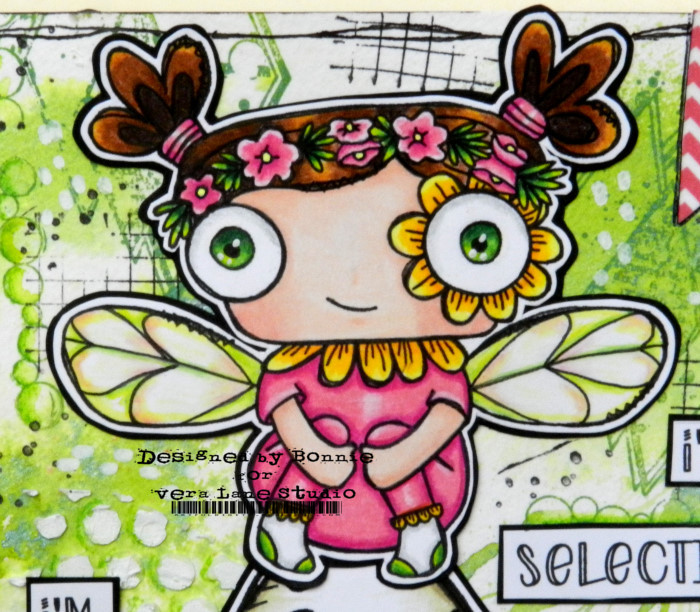
Hi everyone!  Vera Lane Studio released the cutest digi set yesterday called Lil Bit of Heaven. There are two images and a sentiment and I had a hard time deciding which girl I would feature in today's journal page. I ended up choosing the one with wings but you can be sure that I will be playing with the other one before too long. They are irresistible. Because Lil Bit needed a place to sit, I paired her with the mushroom from the Wonderland accessory bundle.


Both Lil Bit and the mushroom were coloured with a mix of Prismacolor and Polychromos pencils.
They were fussy cut twice, once leaving a white border, and again after being matted with black cardstock.


The 6x6 inch watercolour paper background was spritzed with water and then Lindy's Drop Dead Gorgeous Green Starburst Spray, making sure to leave white space (so hard!!). Mowed Lawn Distress Oxide Ink was used to apply Carabelle Géométriks#1 in three places as well as an Inkylicious Borders 1 stamp. A Viva Las Vegas grid stamp and a Rubber Moon Inksplat one were added with Jet Black Archival Ink for contrast. White marks were added with a Posca Paint Pen before Texture Paste was scraped through Studio Light Mask L13. Once things were dry, a green Inktense pencil activated with water was used to shade inside the circle borders and next to the Texture Paste ones.


Pink and white washi tape was adhered to the bottom of the page behind the mushroom and also as two fishtail flags in the top right corner. These were embellished with black enamel dots. The wording was printed onto white cardstock, matted with black. A simple doodled border and black Big Brush pen edging finished the page.

Thanks for stopping by to visit with Lil Bit and me today. That was very kind and much appreciated. When you get a chance, stop by the Vera Lane Studio Facebook group and the VLS Etsy shop where you are sure to gather lots of inspiration and maybe a few "must-haves".

Life is good; so is art.
Bonnie

Tuesday, February 11, 2020

Breathe ~ inspired by a Vera Lane Studio image


Hi everyone!When this digi set called Haircut by Vera Lane Studio first came out, I decided to colour the girl with braids because I love colouring braids. The more I looked at the other image in the set, the more I liked the girl with short hair, too,  because she is just so cute. Here she is starring on her own art journal page. She and I agree...it's about time...LOL. She also has an important message to share with us for when the going gets tough.


I coloured Bob with a mix of Prismacolor and Polychromos pencils, adding a little Milky Pop pen to create the pattern on her dress. Three enamel dots were added for buttons over the ones on the image. She was fussy cut leaving a narrow white border, matted with black cardstock, and fussy cut a second time leaving a narrow black border.


Torn pieces of book paper were added to the 6x6 inch watercolour paper background with matte medium and then covered with white gesso to knock the text back. The page was then colourized using Peacock feathers and Twisted Citron Distress Oxide Inks. Mermaid Lagoon Distress Oxide was sponged through Carabelle Studio Mosaique stencil to create more pattern. A VLV circle grid stamp and an Indigo Blu text stamp were added with Forget-Me-Not Archival Ink. Jet Black Archival Ink was sponged through TCW Tiny Circles stencil to add contrast and that pop of black you know I love.


Bob was grounded with a few strips of torn or cut washi tape. A doodled border and four photo corners were added to frame the page. The sentiment was printed onto white cardstock, cut into individual words, and matted with black. The word, breathe, was given an additional layer of green spritzed paper to add emphasis to it. To finish off the design, three tiny butterflies were punched from turquoise mop-up scraps, edged with Forget-Me-Not Archival ink to darken the edges, and placed around Bob's head to help her relax.

Thanks for joining Bob and me today. We are so glad you did. When you get a chance, pop by the Vera Lane Studio shop to meet Bob's friends. They are sure to inspire you and will be happy to go home with you :) Stop by the Vera Lane Studio Facebook group, as well. There is wonderful daily inspiration and all kinds of fabulous people to chat with.

Life is good; so is art.
Bonnie