

It's time for another Get Altered challenge at eclectic Paperie. The Get Altered Challenge is held on the first Thursday of each month and each challenge is an opportunity for you to be inspired by one of our eTeam’s creations, to share your work, and be entered into our challenge prize drawing! This time it's Donna-Marie's turn to set the challenge and she chose the theme Altered Bottle or Glass. The project I created is another first for me which I love. It's something I have admired and thought about doing but needed that extra push to take the plunge. I am a huge fan of the artwork of Nichola Battilana, a fellow Ontarian who has just been recruited to the G45 DT along with our own Annette Green from the eTeam. Nichola makes the most amazing fairy related creations, among tons of other wonderful projects, and I am smitten both with the results and her accompanying stories. That's why I decided to capture a couple of fairies of my own in response to the altered jar theme.

I started with an Artchix Studio collage sheet which featured these amazing fairy babies breaking out of their eggs. Look at that baby's face...does it not melt your heart? I fussy cut her, inked the edges with Black Soot Distress ink, and created a triangular stand for her.

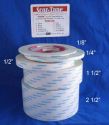
The other image is from Paper Whimsy. She was also fussy cut, given lovely blue butterfly wings, and mounted on a triangular base. Her wings have Icicle Stickles on them which gives them a lovely sparkle. That happens as the fairies grow up a little. Where the fairies are glued to the front of the triangular or tent shaped base, I first coloured the base with Big Brush pens, and then wrapped them with raffia so that the cardstock would not be visible. Both fairies were adhered to the stands about 1/4 " from the bottom so that they would be slightly raised when the nest was added. Double sided Scor tape anchored the base to the bottom of the jar.

To create the nest area and give them a soft place to rest, raffia and brown fibres were fitted in a circle around the fairies as well as in between them. A few short pieces of raffia were also cut and randomly inserted. A shabby chic cotton flower from Maya Road was inserted behind the taller fairy. Smaller mulberry roses were randomly scattered in their nest, as were red berries from my stash. Metallic stars cut from trim were also wedged or glued into place.

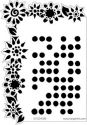
Because I didn't want the fairies to escape until I could capture them on film nor did I want my cat, Molly, to decide they were new toys, I needed to put a lid on the jar. I gessoed the wooden lid and then distressed it with Vintage Photo Distress ink, heavier on the sides than the top. The lid reminded me of a mushroom cap so I placed some dots on it using Wendy Vecchi's white Embossing paste and a Dylusions stencil. Once they were dry, I outlined the circles with black Micron pen, and then colourized them with Dylusions Postbox Red spray ink applied with a brush. I thought perhaps the mushroom cap would make these wee friends feel more at home.
I love the magic and whimsy of this make. It makes me smile every time I look at it. Thanks so much for stopping off to meet these little sweeties today. Be sure to check out the rest of the Get Altered projects on the eP blog. Donna-Marie, talented woman that she is, has an incrediblel inspiration piece on the blog and the rest of the DT's projects can be found by clicking the linky with their names underneath. I'm so looking forward to seeing all of the projects from them and from you. There are so many ways to alter jars or bottles and play along. I know I'll learn lots :)
Life is good; so is art.
Bonnie
For a link to the goodies from the eclectic Paperie shop which were used in this creation, click on the thumbnails below.
 |  |  |  |
 |  |  |  |

16 comments:
So adorable! I love, love, love the spotted cap.
Hey, how did you know what I was thinking? Hahaha This is what my original idea was until I found my other bottle and had to change my design.
This one is too cute for words!! The mushroom top was a fab idea :-) Your work is always so unique love it!!!
Hi Bonnie, it made me smile big too! That little baby looks just like my new GD with her little chubby cheeks..... I really love the idea of the nest and also the way the top looks like a mushroom, as if you had just picked it up from the bottom of the garden...a wonderful make! Hugs, Anne x
Darling! Such a cute idea and I can think of lots of little items to hide in jars...Fabulous!
so precious! I love your fairies and the nest and mushroom top are perfect!
Your little fairies are so sweet and you have placed them in a perfect setting---comfortable and safe in their little nest with a mushroom cap for shade.
Great idea love the mushroom effect, super cute and gorgeousx
Wonderful whimsy my friend. You picked a really fun way to express this challenge. Hugs!
So quirky - a really delicious make... I love your "captured" fairies - and the mushroom lid is a fabulous touch!
Alison xx
Very cool. Love it.
I love the idea of captured fairies!! My grandkids would love to try this. I'll have them next weekend and we may give it a go. Love your project and LOVE that mushroom top!
You know the moment I saw your glass project, I was thinking how awesome to put art IN the glass and I was like "duh, why didn't I think of doing something like that" Truly wonderful piece of art. I love the fairies. It's like looking into a magic world.
Love those little baby fairies in a jar. Great creation!
That is just sooo adoreable Bonnie!
Big hugs
Tracy
xoxo
FANTASTIC piece!!! What an imagination...I love this!!!
Very nice! It never occurred to me to put something on the inside! Lovely!!
Post a Comment