Monday, March 31, 2014
You Can Bug Me Anytime ~ CYP Challenge 207
Big happy hellos to everyone! I hope you all had a great weekend. It's Monday and that means that it's time for a new challenge at Craft Your Passion Challenges. Our theme this week is Any Shaped Project but Square which I love because I fall into the rut of making the traditional square or rectangular shape all the time and it's good to shake it up every now and again. Our wonderful sponsor is Doodle Pantry and when I chose my image, of course, I came away with a BIG wishlist as usual. I chose to play with Ant Masquerade, colouring it with my Prismacolor pencils. I love that the ants are in disguise as other bugs...so cute. I chose bright colours to remind me that although it snowed again on the weekend, spring will eventually arrive (fingers crossed).
To create the shape of the card, I traced around the image using a kitchen plate as a template...very high tech and complicated! Then I cut a black folded piece of cardstock as a mat. Before layering the image onto the background, I applied Broken China Distress ink to the sky and Vintage Photo DI to the ground area using a blending tool. Faux stitching was doodled around the edges.
The fun sentiment also came with the image...love how Doodle Pantry does that and also gives you several choices. I punched an arch above and below the words and matted it with black before popping it up with foam squares. Some dotty ribbon was adhered to the top left of the card and a stacked flower with a button center to the right side. Three little gem flowers with white half pearl centers were added to the ground both to bring some purple down to the base and to add some sparkle.
And that's it for this simple but whimsical card. Love these ants...not the real ones because I am allergic to their bites. These don't bite so we get along fine :) Actually, I overheard them saying the same about me..lol. Thanks for visiting today. I appreciate your fine company. If you get a chance, pop by the Craft Your Passion Challenges blog to gather more inspiration from my talented teamies. I'm hoping you'll join us this week in our Any Shaped Project but Square challenge.
I am entering this card in the following challenges:
613 Avenue Create ~ #65 Anything Goes
Come & Get It ~ In the Garden
Dragonfly Dreams ~ #3 Up in the Air
Lacy Sunshine ~ #30 Add flowers
One Stitch at a Time ~ #200 Anything Goes
Sentimental Sundays ~ #200 Add a doodle to it
Di's Digi Designs ~ Welcome Spring
The Doodle Garden ~ March Anything Goes
Life is good; so is art.
Bonnie
Friday, March 28, 2014
Magic in Everything and Exciting News
Oh my word, I am so excited! I have been invited to join the DT for The East Wind, those fabulous images by Unky (aka Kyra Eunkyo Kim). I love her images...they inspire me so much and all seem to have so many stories to tell and to unfold in mixed media art as well as in cards and tags. The team is so talented and creative that I feel so lucky to be included. There are two challenges each month on the Challenge blog as well as a Facebook contest. In order to kick off joining this team, I decided to create an art journal spread following the Facebook theme of Magical Creatures.
I layered black gesso over the journal pages using a gift card to get lots of texture and lines. When that was dry, I applied Treasure Silver with my finger to highlight the high spots as well as add a little sheen to the lower areas. It broke up the black and made the texture very visible. Next I applied white gesso through Dylusions Diamond of a Border stencil. I found some old sheet music at the thrift store and the one song was Haunting Me which was perfect for this spread. I tore a section out and adhered it to the page with Matte Medium. More stencilling was done by applying Golden's Iridescent Copper through TCW's Mosaic Tile stencil.
This gorgeous image, Lucy Loo Love Letters II, from The East Wind shop was coloured with Prismacolor pencils and fussy cut before matting it with black cardstock. Her hair was so fun to colour and I love her pretty face. I popped her up on foam tape to achieve greater dimension and shadow and layered tiny strokes for her cat's fur.
To continue the silver theme, I applied silver metallic tape (from the garage) to black cardstock and die cut the Memory Box star banner. The extra stars were scattered around the piece and one of the punched circles became her earring. Two other pieces of the tape were put through a TH diamond plate embossing folder. One section was layered behind the sentiment and another was torn and added to the top of both pages.
The sentiments came from Create With TLC. Paulette has so many awesome sentiments. The Hold on to the Magic one was crumpled, grunged up with Vintage Photo Distress ink, and distressed around the edges. The word Magic was scuffed with Clear Wink of Stella to create shimmer.
The other sentiment was punched out with a scallop circle punch. Tiny playing cards were placed over the cards on the image. The dice, hat lining, and scarf were coloured with Prismacolor pencils. The butterfly was fussy cut and Stickled before a miniature spoon was added as its body. It was adhered over the tiny butterfly in the image because I needed to bring her hair colour to the other page. The circle was aged with Antique Linen Distress ink as well as Black Soot around the edges and doodling was added as a border. The little silhouette cats were cut from an Impression Obsession die. Once they were set loose, they just went everywhere on the pages :)
Two scraps of cheesecloth were adhered to the pages and two Idea-ology pen nibs were Glossy Accented to the cheesecloth to continue the writing theme from the image. A clock button and some tiny dice finished off the lower vignette. A skull was printed from a TFS file and punched in a circle to repeat the skull in Lucy's hair. Bits of washi tape, and a torn piece of filmstrip border were added to underline the words "are you haunting me".White pen dots, scuffs of white gesso, and outlining the edges in Black Big Brush pen and I called it "Done".
I thank you for visiting today and allowing me to share my exciting news with you.There's still lots of time left on The East Wind Facebook contest for Magical Creatures. Our other challenge begins on The East Wind blog on April 1. Hope to see you there, too.
I am entering this journal spread in the following challenges:
As You Like It ~ Favourite Animal (Cat) ...I love their beauty, their independence, and how they always remember the importance of play)
Creative Knockouts ~#30 Texturize it (gesso, dry embossing, cheesecloth)
Delightful Challenges ~ Out Like a Lamb (animal)
Dream It Up ~ March Madness #4 Anything Goes
Paper Crafting Journey ~ Anything Goes
The Sisterhood of Crafters ~ Animals
Robyn's Fetish ~ Anything But a Card
Life is good; so is art.
Bonnie
Monday, March 24, 2014
Gardenias and Pearls ~ CYP Challenge 206
Our challenge theme for this week at Craft Your Passion Challenges is Mother's Day/For the Ladies. In Canada, our Mother's Day is celebrated in May so I'll be ahead of the game...for once :) We have the privilege of having Aurora Wings as our sponsor this week. I absolutely adore Mitzi Sato- Wiuff's beautiful images...you know how I love to colour faces and hers make me sigh! I coloured Woman With Gardenias and Pearls with my Prismacolor pencils, adding Cotton Candy Stickles to the pearls in the image. She was a dream to colour. Her earrings are flat white pearls. The shape was cut using a Spellbinders Labels One die and the edges were inked with Spun Sugar Distress ink. A second slightly larger mat was cut from green patterned paper inked around the edges with Pine Needles Distress ink. The two layers were offset and popped up on foam.
The background paper was cut on the one end with an MFT scallop border die before being adhered to the white card base. A strip of companion paper to the image mat was inked with Pine Needles DI and then adhered near the bottom of the background DP. A double row of pearls was layered over the strip and the image was placed over that. To soften the background and add more texture and whimsy, two small pieces of cheesecloth were tucked under opposite corners of the green mat. Flat pearls were added. Love the shine of the pearls and the loose weave of the cheesecloth together.
A pale pink mulberry and two smaller creamy paper flowers were added to the upper right corner as well as an odd number of the white pearls. This scatters the pearls throughout the card and repeats the pearls from the dreamy image. This is an unusual card design for me as I often go for vibrant colours both in my colouring and in the background. I listened to the image who was very clear on how she wished to be coloured...softly and delicately. And she was right!
Thanks so much for stopping by today. When you get a chance, pop by the Craft Your Passion blog to see the lovely creations by the rest of our talented DT. And if you haven't already, stop by the Aurora Wings shop to check out more of Mitzi's gorgeous images.
I am entering this card in the following challenges:
Aurora Wings ~ First challenge (Yay!) Anything Goes
613 Avenue Create ~ #64 Anything Goes
One Stitch at a Time ~ #205 For a Woman in Your Life (my mom)
Pile It On ~ #12 Pretty Hair
Stamping Sensations ~ All in the Pink
ABC Challenge ~ H is for Hair
Life is good; so is art.
Bonnie
Saturday, March 22, 2014
Brittany, a sweet flapper
One of our Craftitude DT members was unable to complete her card for this challenge so I seized the opportunity to play with another artbymiran image for our current challenge, Anything Goes or Add a brad/eyelet. This little sweetie is called Brittany 1920s Flapper and, of course, I coloured her with Prismacolor pencils. I fussy cut her leaving a narrow white border and then matted her in black.. A black gem was placed in the center of her headband flower and Black Diamond Stickles were added to her sash. A Clear Star Jelly Roll was used to dot around the flower and outline the sash. Her pearls were dotted with white Scribbles paint.
The card is a step card and the panels were layered with scraps of black and white paper. A double row of gems was adhered across the top edge over a scallop border cut with an MFT die. Tiny star sequins were glued to the scallops. To me, this became the curtain of a stage and the gems, the lights.
The sentiment from Create With TLC refers to Brittany's dreams to make it big in the theatre :) A pretty paper flower was used to embellish the one side of the sentiment and two heart brads decorated the other.
That's it for Brittany and me today. We thank you for visiting and hope you are having a wonderful weekend.
I am entering this card in the following challenges:
artbymiran ~ Anything goes
2 Sisters ~ #174 Black and White and one other colour (red)
Sweet Stamps ~ #161 Anything Goes
Feeling Crafty ~ #26 Use a Digi and Bling
Life is good; so is art.
Bonnie
Friday, March 21, 2014
Craftitude Challenge #61 ~ Add a Brad or an Eyelet
Woohoo! It's time for our new challenge at Craftitude Challenges and this fortnight we are honoured to be sponsored by artbymiran. Love her images and was amazed to discover that Mi Ran Jung, the artist, lives only about an hour away from me. We're practically neighbours...lol. The image that I chose to play with for my ATC is called Bashful Belinda and is available in artbymiran's Etsy shop here. I coloured Belinda with Prismacolor pencils, fussy cut her, and popped her up on foam tape.
The background is triple layered: gold patterned paper (MME), brown cardstock, and Lady Couture glossy embossed paper (DCWV). The edges of the two patterned papers were inked with Vintage Photo Distress ink, and the bottom layer was faux stitched. Tiny butterflies were cut from vellum and patterned paper using a Recollections punch. The vellum wings were folded up and edged with Vintage Photo and then Icicle Stickles. Tiny amber gems were added to the bodies once the two layers were attached in the center and also to Belinda's hair ornament. The pocket watch is a brad, and those teeny tiny flowers were cut with a Punch Bunch punch which my buddy, Paulette, sent me...thanks, Paulette.The flowers were sculpted slightly with a stylus and then half pearls were added to the centers and tiny green triangles for leaves.
Belinda and I thank you for visiting today. She would tell you herself but she's...bashful. If you get a chance, pop over to our Craftitude Challenges blog to see the gorgeous creations by the rest of our talented team. Stay tuned over there for a DT call which will be posted next week. We'd love to have you join our team.
I am entering this ATC in the following challenges:
artbymiran ~ #2 Anything Goes
Brown Sugar ~ #86 Anything Goes
Crafty Catz ~ #223 Bling it up
Digi Haven ~ Things with wings
Creative Knockouts ~ #29 Things with wings
MilkCoffee Challenge ~ At least 2 flowers
Divas By Design ~ Flower Power
Life is good; so is art.
Bonnie
Thursday, March 20, 2014
Uniquely Me ~ eP Mixed Media Tag
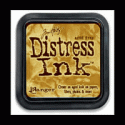
Hi everyone! Last week I showed you the first altered tag I made with one of the multiplication flash cards I scored at the thrift shop. Today, I am showing you her friend, UM. I started the background at the same time as the first one because I had enough ink on my craft mat to sop up that I could do two more tags. The background was gessoed and then the tag was dragged through puddles of Scattered Straw and Picked Raspberry Distress ink which was smushed onto the mat and spritzed with water. I kept the ink to the inside of the tag and dried it. Peacock Feathers DI was applied to the edges with an ink blending tool.
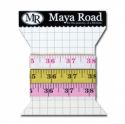
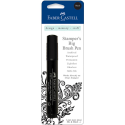
UM (Uniquely Me...remember when Alice told the queen her name was UM in the Wonderland movie) is a melange of various elements from collage sheets, many from Deviant Scrap. There are bits from at least 5 different collections, all cadged together to create this unique image. So fun doing that! Doodling was added to further embellish her, as well as Prismacolor shading, and a tiny feather (stuck a feather in her cap) added to her stylin' hat. She was lined with a Pitt pen, shaded around with Prismacolor pencils and the Stabilo pencil. Once she was adhered to the tag. a cloud cut with an MFT die and left over from another project was inked with Salty Ocean Distress ink, doodled on, and added to the top with a soaring bird image for company. The top letters for I am are glittery puffy stickers. Uniquely Me was computer generated and printed on an Idea-ology vial label which I then smeared with my finger (on purpose) while the ink was still wet. The entire tag (flash card) was inked around with Black Big Brush pen to frame it. The tag topper is Vintage Tape Measure from Maya Road.
Thanks so much for stopping by today. I always appreciate your visits and lovely comments. They make my day...and UM's day, too.
Life is good; so is art.
Bonnie
Here are links to the eclectic Paperie store for some of the products used today:

Monday, March 17, 2014
Fun (and Green) birthday wishes ~ CYP Challenge 205
Happy St. Patrick's Day everyone! In honour of the day, our challenge theme for this week at Craft Your Passion is "Go Green". We want to see green coloured projects or projects with recycled elements. My card has both. Our fabulous sponsor this week is Inky Impressions and I chose to play with Birthday Sandy. Doesn't she have the sweetest face? I coloured her with Prismacolor pencils, fussy cut her, and popped her up on foam tape for dimension.
The background started with two papers from a Paper Wishes birthday pad which I overlapped and then matted on a layer of green and a layer of brown cardstock. Two more papers from the collection were punched into semi-circles and layered on the right side. Sandy needed a place to sit so I die cut a tree branch from a piece of recycled packaging and adhered it over the seam of the two papers meeting. Clouds were die cut using an MFT die and a scrap of checked paper. The lettering for Fun is glittery black stickers.
The Birthday Wishes banner also comes from Inky Impressions. I printed it on gold coloured cardstock and then darkened the letters with a black Pitt pen. The dots on each i were created with tiny flat black pearls. Shading was done with Prismacolor pencils and then the banner was fussy cut, matted in brown, and popped up on foam dots. To complete the card, faux stitching was done with a black Pitt pen.
Sandy and I thank you for stopping by today. If you get a chance, pop over to the Craft Your Passion Challenges blog to see the wonderful Green creations from my talented teamies.Hope you'll play along this week and show us your green, too.
I am entering this card in the following challenges:
613 Avenue Create ~ #62 Anything Goes
Glitter n Sparkle ~ #76 Include some green
One Stitch at a Time ~ #204 Use a Digi
The Corrosive Challenges ~ #195 Option 1 photo inspiration and Option 3 Something recycled (packaging)
Hiding in My Craft Room ~ #141 Colour it
The Doodle Garden ~ #1 Anything Goes
Life is good; so is art.
Bonnie
Sunday, March 16, 2014
Tah Dah!
I recently scored a whole box of well-loved multiplication flash cards at the thrift store. They are a great size (3 x 6 inches) and decent weight cardstock. I like the bold black writing on the white cards and thought they would be fun for mixed media tags and art journal tip-ins. The price was right...$1 for 91 cards.
I applied gesso to the card still allowing the black numbers to peek through. Next I scribbled pink and yellow Neocolor II watercolour crayons over the gesso and spread the colour with a waterbrush. I intensified the colour by smushing Picked Raspberry and Scattered Straw Distress inks onto my craft mat and then spritzing with water. The flash card was then placed into the pools of watery ink, dried, and dragged through the remained of the ink until I was happy with the results. I turned the card in different directions to get drips.
A TH text stamp was applied to the background with Brilliance Archival Rocket Red Gold ink...love the shimmer of that ink! White gesso was sponged through TCW's Mini Punchinella stencil. Old book text was then torn and applied to the background in three chunks. White gesso was washed over the top of the text and then finger painted on to get stronger streaks in some areas. A small woven lines texture stamp was lightly inked with Jet Black Archival ink and stamped randomly on both the text and the background.
The images are a mix of collage elements from Deviant Scrap, mainly from the Dream Fairies digital images. They are separate elements which can be combined in so many ways and can be sized to fit. I often take a head from one set, wings from another, legs or overskirt from yet another until I create an image that makes me smile. Then I fit them together, trim here and there, and voila...a new character emerges. I applied Icicle Stickles to the wings and double layered the crowns with foam tape in between. Flat black pearls accent the crown and white ones form her tiny buttons. The Tah Dah sign was also part of the Dream Fairies package and so reminded me of one of my mixed media inspiration sources, France Papillon. She says that at the end of her videos and it always makes me grin...so cute!
Lots of doodling and outlining, some washi tape, and black heart shapes (which just happened to be sitting on my messy desk), also made their way onto the tag. Black twill ribbon became the tag topper and a punched scalloped border completed the bottom of this funky tag. I had so much fun creating and playing. I started a couple of other backgrounds while I was mopping up so you'll be seeing the friends of the Queen of Tah Dah very soon.
Thanks for popping by...love it when you do that :)
Life is good; so is art.
Bonnie
Saturday, March 15, 2014
Sneaky Peek of my eclectic Paperie blog post
Hi everyone! Today I am posting the N (N is for Novel) spread in my altered dictionary over at the eclectic Paperie blog. I'd love it if you bounced over there to see the real deal :) This is just a teaser! I used a ton of eP products for this play session.This gorgeous digital image comes from The East Wind shop on Etsy. I love Unky's fabulous images...they are wonderful to colour. Prismacolor pencil heaven!
Life is good; so is art.
Bonnie
Wednesday, March 12, 2014
Complicated Artists Who are Not Amused...lol
Did that title confuse you? I just took bits of the sayings on each of my altered playing cards and smashed them together. It sounds like a tabloid headline...gave me a chuckle anyway. It's been a while since I have posted any of these so I thought I'd share another three. I have to prep another deck so that I'm ready to play some more. Once again the backgrounds are a combination of products to get colour onto my cards. I won't go into the steps since it's a spin-off from the wonderful workshop I took with Mary Jane Chadbourne last summer. I can tell you that I used gelatos, watercolour crayons, and Big Brush pens primarily, along with white gesso stencilling, and stamping with Archival inks. Rings were added with watered down black gesso on bottle lids. Paper scraps, washi tape, and a litttle drywall mesh also make their appearance. All of the images are from Deviant Scraps and were fussy cut. All of the wording was generated on the computer, fussy cut, and matted or edged with black. The woman in the first card is indeed complicated given that she is part bee. However, sometimes complicated can be fascinating or at least a great story. Anything or anyone with layers can seem complicated initially.
The second one has a saying that I truly believe. We are all artists and we all are creative. We might not all be in touch with those parts but if we look for both, they are there. I love how matter-of-fact his expression is...like we should know this. He also embraces his individuality. There is a tiny piece of burlap behind him plus old book text and some stencilling from TH's Measured stencil.
The third playing card just makes me smile because the girls who I imagine as sisters look so serious. I wonder if their brother is teasing them again or if Uncle Ted just pranked them.The stencil at the top of the sky is from TCW's Well Rounded template. The brown trees behind them are part of the leftover or negative piece from a die cut which was sitting on my desk waiting its turn to make art.
That's it for me today. I thank you for visiting and for the wonderful and supportive comments you leave me. I do appreciate them. I hope you get a chance to get messy and play soon.
Life is good; so is art.
Bonnie
Monday, March 10, 2014
Young at Heart ~ CYP Challenge #204
We have a new challenge at Craft Your Passion this week: Young at Heart. We want to see projects made for the young or the young at heart. Our wonderful sponsor is Heather Ellis. I love the sweetness and innocence of her adorable images. They speak of a simpler time. This one is called Pure Innocence 013 and I coloured her up with my trusty Prismacolor pencils. Her eyes are tiny flat black pearls. I fussy cut her leaving a narrow white border around her so she would contrast more with the busy background. She was popped up on foam tape and asked to wait patiently while I made her a home.
The background is a piece of chevron paper from my stash which was matted with black. A scrap of black paper which looks like a child's printing on a chalkboard was cut with a Memory Box ticket die. The layer in between the two patterned papers was torn from a child's dictionary, inked with Vintage Photo Distress ink, and matted with a torn piece of black cardstock. Two lengths of black twine were layered over the background before it was adhered to the white card base. Three threaded black buttons were glued to the left side of the card with Glossy Accents. A red heart was hand cut, embossed with dots, and inked around with Black Soot Distress ink before being popped up on foam dots. The lettering for "at" is stickers and two circles in the word young were coloured in red, both to draw attention to the word and to add another spot of red to the card. A simple scalloped border completed the card.
Thanks for popping by today. I love when you do that. If you get a minute, check out the Craft Your Passion Challenges blog to see the cards from the rest of our creative DT. It's so fun that we all interpret Young/Young at Heart a little differently. Can't wait to see your take on it.
I am entering this card in the following challenges:
613 Avenue Create ~ #62 Anything Goes
Glitter n Sparkle ~ #75 Anything Goes
ABC Challenge ~ G is for Girls
Doodle Pantry ~ #44 Any Digi Goes
Sweet Stampin' ~ Inspired by a Song, Film, or Book ((Song...Young at Heart by Frank Sinatra)
Life is good; so is art.
Bonnie
Friday, March 07, 2014
Two Beauties and a Touch of Green ~ Craftitude Challenge # 60
We have a new challenge at Craftitude Challenges this fortnight and two amazing sponsors. Our themes this time are Anything Goes (always) or Add a Little Green (as a nod to St. Patrick's Day). Our two sponsors are Sassy Studio Designs and Aurora Wings...so hard to choose the images to play with when they are all gorgeous! From Sassy Studio Designs, I decided to play with St. Patrick's Day Sassy in honour of my one quarter Irish background. I coloured her with Prismacolor pencils and used a metallic gold jelly pen on her buckles. Then I fussy cut her and popped her up on foam tape. The foam on the beer is a combination of Icicle Stickles and white 3D fabric paint. The background paper was a scrap of green patterned paper edged with Mowed Lawn Distress ink, and layered over black and then green cardstock. The edges were doodled with a black pen and the layer of pp and black was wrapped with black twine to mimic the lacing in her corset. The shamrocks were cut with a Fiskars punch, smeared with Green Stickles, and then inked on the edges with Black Soot. March was printed from the computer and the 17 is stickers.
The image I chose to play with from Aurora Wings is called Water Lily Fairy. Again (and no surprise) I coloured her with Prismacolor pencils and then fussy cut around the top. I matted the image with black cardstock and popped her up with foam tape. The background is another scrap of green matted with white and then black cardstock. The white layer was edged with Black Soot Distress ink. Once again, I doodled a border with black pen and punched three stars from the black cardstock. These were adhered over her head and tiny silver star beads were glued onto them with Glossy Accents.
Thanks so much for visiting today and for checking out my ATCs. I'm always appreciative of your company. If you get a chance, pop over to the Craftitude Challenges blog to check out the wonderful cards and ATCs by the rest of our talented DT. We'd love to have you join us this fortnight for Anything Goes or Add a Little Green.
Life is good; so is art.
Bonnie
Subscribe to:
Posts (Atom)


