Showing posts with label altered book. Show all posts

Tuesday, July 09, 2019

Home ~ a book in a tin inspired by Vera Lane Studio images


Hi everyone! Those who have been following along for the past while already know that I have been on a mission which I call "Holy Cow! Use it, already". This self-assigned mission is me giving myself both permission and the challenge to use things which have been in my stash for a while, either forgotten, hoarded for the "special someday project" or just acquired in a moment of weakness...LOL. Today's project for the Vera Lane Studio design team uses a little 3.25 x 1.5 inch tin with an even smaller (3 x 1.25) accordion book inside that unfolds like a bunch of tickets. It's been in my stash for ages and today is its day to be filled with Vera Lane Studio Tall Town images.


I used all 6 of the Tall Town houses for this book, leaving the first and last panel for one of the sentiments from the same digi set. The houses were coloured with a limited palette of Prismacolor and Polychromos pencils. I wanted the houses to coordinate and also pick up some of the background colours. Each house was fussy cut leaving a narrow white border and matted on three sides with black cardstock. The bottom of each house was simply inked with black Big Brush Pen to add black without adding any more length.


Each panel was either given a black punched star for the background or tiny stars somewhere on the house. Above, you can see the tiny stars adhered as the flower centers.


To create the background, I began by spritzing the joined tickets with Lindy's Shabby Turbine Teal Starburst Spray and water, followed by Lindy's Van Dyke Sepia Moon Shadow Mist which I blotted with paper towel to keep it light. On the back, I stencilled some harlequin designs and script stamping with Coffee Archival and inked the edges of both front and back with the same ink. Black pen was used to doodle a frame on each panel.


The sentiment from the set says" Home is where your story begins". I printed the words and cut them apart, matting them with black. The word "Home" was placed on the first panel as the title of the book. It was adhered over a book text heart which had been dry brushed with gesso to knock back the print. The rest of the quote, minus the word "is", was adhered to the last panel along with another of the black punched stars to mark the end of the book.


I decided to keep the tin fairly plain. Pool and Patina Alcohol Inks were added to the top of the lid and once dry, a fixative spray was added. Jet Black Archival Ink was used to stamp both script and splatter dots over the ink. A metal puffy heart was adhered to the center of the lid using E6000 glue. To keep the book closed while inside the tin, a length of seam binding was wrapped and tied in a simple knot.


This is the cutest little project and I love how those houses are the ideal shape and (thanks to the magic of digi stamps) sized to fit perfectly on these tiny pages. Above is a terrible photo of how the book looks stretched out. It's about 23 inches long when all 8 panels are unfolded. 

Thanks for stopping by today. When you get a minute, pop by both the Vera Lane Studio Etsy shop and the VLS Facebook group where you are sure to be inspired. We'd love to see what you are creating with the plethora of VLS images.

Life is good; so is art.
Bonnie

Wednesday, September 27, 2017

Rust and grungy goodness ~ another junk journal page


Hi everyone. A while ago when I was rusting some safety pins to use in my junk journals and other mixed media art, I used a couple of pieces of white cardstock to set the pins on in the sun once they came out of the soaking solution. When they weren't rusting as quickly as I wanted (yes, I'm impatient), I spritzed them with more of the solution and let them dry again on this same paper. Well, the pins turned out fabulous and ...Bonus...the paper they were dried on was equally awesome. Its rusty and grungy with amazing texture and imprinting. I just knew it had to be another page in my current junk journal. I folded it in half and then stitched around the edges, punched my holes for the binding, and then waited to be inspired.


The problem was that I didn't want to cover the rust and grunge and I just knew that I would want to pet the rusty rough texture. Yes, I do that...LOL. Anyway, I decided that a tuck spot on the diagonal would leave more exposed rusty paper so I went with that. I tore a piece of black cardstock to the angle I wanted and then tore a scrap of designer paper to fit inside the black one while leaving a border on both sides and inked the edges. These two pieces were then stitched on my machine along three sides  leaving the inner edge free to create another tuck spot. The pockety tuck spot thingy was adhered to the background along the outer edges so now I had two pockets to stash things for the price of one :) A die cut doily was scored and folded in half so that it could be wrapped around the outer edge, becoming an element on the front and back of this page.


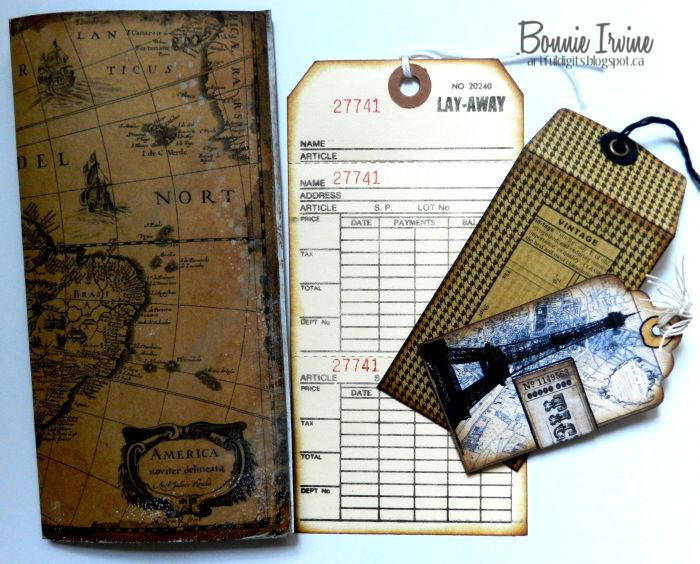
Because I wanted to leave the rust as exposed as possible, I chose two skinny things for the lower pocket and one for the top pocket. A rectangle of map printed on kraft cardstock was inked and folded in half. Inside, gesso was spread over the faded floral pattern to knock it back so it could serve as a journalling spot. A Lay-away tag purchased from J9Scraps was inked on all edges and the back left blank for writing. The little envelope was a Graphics 45 embellie, into which I inserted a small printed tag from Pixel Market. The ticket from Vectoria Designs was wrapped around to the back which still leaves room to write.


The other side of the page is where the imprinting of the rusty pins was most noticeable. I added some circle and punchinella stamping with Coffee Archival to add to the texture and patterning. 


A 2.5 inch black band was cut and layered over with a 2 inch distressed rectangle of the same designer paper from the other side. This was stitched around and then the stack was adhered top and bottom to the background creating a belly band to hold ephemera. An accordion folded, inked, and sewn length of vintage book paper was centered on the band and was then topped with a die cut corrugated heart and a vintage button.


Here is the finished page with the goodies tucked under the band. There is a downloaded Western Union telegram form, a post card, and a railway ticket, all with journalling room on the back. This double page went quickly because most of the heavy lifting was done by the random rusting and imprinting done by nature.

Thanks for visiting today. I appreciate that so much! Who knows where this junk journal will take me next. It's certainly a place for experimenting and re-purposing...love that!

Life is good; so is art.
Bonnie


Monday, September 25, 2017

Another page in my Kraft, Black, & Cream Junk Journal


Hi everyone! It's been a while since I posted a page for my on-going WIP, my kraft, black, and cream junk journal. Sometimes life gets in the way of creating for the sheer pleasure of it. I managed to finish a couple more pages so I'm stealing away some time to share the first one here. Most of my pages are in the vicinity of 5.75 x 8.75 inches in size but I wanted to change that up a little so I chopped the length of this one to 7.25 inches. I like when all the pages are not the same and because these are unbound, I can go back and throw in some odd sizes any time I want. I added a punched border on the edge of the page before I stitched around the kraft background and inked the edges with Coffee Archival Ink. Black cardstock reinforcements were punched and adhered around the holes.


The same ink was used to edge the half doily which I used as a tuck spot. It had also been stamped with a Bo Bunny script stamp before it was layered over a strip of selvedge fabric with a fringed edge. I have become quite the hoarder of anything that I think might become an element on a junk journal page...LOL. On top of the doily and fabric strip, I used a scrap of designer paper which already had holes punched on one edge.


I wanted some space for hidden journalling so I folded a 5.5 x 8 inch rectangle of cream cardstock in half and rounded the corners. Coffee archival was used to edge all sides inside and out and faux stitching was added to the front edges only with a sepia Micron pen. I have had this fabulous bee printed burlap trim for ages because I love bee images so I decided to cut a circle around the bee and make it the focal of my little journalling booklet. I layered him over a scrap of  kraft paper with a star punched from it and then coloured in the star once it was adhered to the background. Over that was adhered a scrap of corrugated coffee sleeve inked around the edges with Coffee Archival and scuffed over the corrugation with white gesso. A tiny scrap of cheesecloth bridges the place where the burlap meets the corrugated paper, and an Idea-ology Big Chat sticker provided the word Imagine. The top right corner was finished with punched and inked text stars offset with some black ones to create a shadow effect, as well as three little black enamel dots. A tiny TH paperclip keeps this booklet in place under the tuck spot.


The reverse side of the page was quick and easy. A6 x 6 inch piece of designer paper was cut to fit and the edges were inked with Coffee Archival before it was adhered to the center of the page. Part of the kraft paper which I cut off to change the size of this page was stamped with a ruler stamp using Coffee Archival. This was layered horizontally near the bottom of the page, adhering only the left and right edges to form a band into which I could tuck tags. A strip of corrugated coffee sleeve was inked and adhered over that...love that texture and you can see the slight curve along the top edge.


The larger tag was created by stitching  a rectangle of map paper to one of coffee dyed paper both for stength and to give a journalling spot on the back. Before it was stitched, a music paper scalloped circle was inked and folded over the top edge so it showed front and back. A die cut and embossed butterfly with a threaded button center was adhered to decorate the music circle. The smaller tag was stamped with a second generation text stamp to make the text more faded and uneven. It was stitched around and then inked with Coffee Archival. A tiny envelope was die cut from kraft paper and the heart opening was layered on the back with a scrap of black. The word notes is a TH Chit Chat sticker. A length of lace became the small tag topper and it was held to the larger tag with another paperclip.


The backs of the tags were only embellished with TH rub-ons  to allow lots of space to write.

Thanks for joining me today. I appreciate your stopping by. I have another page for this same junk journal but I will leave that for another post. I am having great fun with this project and am not nearly finished with it yet :)

Life is good; so is art.
Bonnie

Monday, August 14, 2017

My Kraft Junk Journal - Page 2


Hi everyone! I'm here to share another Junk Journal page which I created for the JJ I started here. For this page, I decided to use a 5.5 x 8.25 glassine bag which I purchased with some other fabulous ephemera from an Etsy seller called J9Scraps. I can't say enough great things about Jeannine's products and customer service. She sent my treasures, all carefully and beautifully packaged, the morning after I ordered. She's awesome! Anyway, I started by punching the holes in the sealed ends of the bag and then cutting and adhering book printed reinforcements. That gave me the line where I wanted to machine stitch, both to add the detail and also to prevent the tag from blocking the hole openings.


I adhered strips of TH ruler stickers to the top of the front section of the bag and both the front and back of the back section. I did this to strengthen the glassine so that it would stand up to the tag being pulled in and out. It also looks fun :)


The tag created to fit inside the glassine bag was cut from the same kraft paper that came with the book. It was cut to 7.25 x 5.25 inches with the upper corners sliced off at an angle to create the tag shape. All sides were machine stitched and then inked with Coffee Archival Ink using a mini ink blending tool. Stencilling and stamping were done on the tag with Coffee Archival Ink using  Carabelle Studio Weft Fabric and Numbers template and a TH spatter stamp. A stack of layers was created with a piece of handmade text printed paper, a ripped strip of music paper, two torn pieces of corrugated coffee sleeve, and an Etsy image which had been stitched around. All pieces were inked around with Coffee Archival Ink before anything was adhered. A corner from a coffee dyed paper was tucked under the right side of the focal image and a vintage threaded button was added to that. Overlapping the image and layers of the background, was a strip of striped and frayed fabric with a black Big Chat Sticker adhered on top of that. A little extra stitching design was added with a VLV stamp to tie the music paper to the background on the right side.


The back of the tag was stencilled with TCW Harlequin Stencil and the same spatter stamp using Coffee Archival Ink. A journal spot from Bo Bunny was cut to fit the tag as a tuck spot. Both the journal paper and the tag were inked around the edges with Coffee Archival and the journal page was adhered to the tag only along the flat edge. The butterfly, another TH sticker (which I've had for years and never used) was glued to the flap.To create a topper for the tag, a length of measuring tape twill ribbon was folded in half and stapled to the top. To disguise the loop where the ribbon was folded, a threaded vintage button (thank you, Gram) was adhered on top of it.


Two pieces of ephemera, from an Art-C package, were edged and stamped with Coffee Ink and attached to the tag with an Idea-ology tiny paper clip. The back of the Toys tag was stencilled with the same Harlequin stamp and a scrap from the journal spot was added to the top edge. The music paper has another song on the back of it.

So not only am I loving the creativity which is tapped (and challenged) by the Junk Journalling process as well as all that I am learning as I go, but I also am totally loving using things that have been in my stash for ages and mostly ignored. It's amazing when you change your focus, how you can see uses for things that you didn't bother with before. Anyway, thanks for joining me today. I appreciate your company :)

Life is good; so is art.
Bonnie

Friday, August 04, 2017

Junk journalling ~ a beginning

Hi everyone! So I have been watching tons of YT videos and visiting blogs (thanks to Pinterest) on creating junk journals. Not the kind of junk journal where I would create my art journal pages with layers and layers of mixed media goodness. These journals are constructed from a combination of old and new papers, vintage and digital ephemera, and leave lots of space for writing or sketching. I love the engineering that occurs on each page with the tuck spots and hidden spaces as well as the opportunity to create tags and smaller art. I also love that there is opportunity to include fabrics, textures, and sewing. The final bonus...it gives me a creative way to use things in my stash that have been waiting their turn for absolutely ages.


There are many different styles of bindings and formats. At first, I was all set to sew signatures into a vintage book cover but I became totally bogged down with choosing the "right" papers and order, etc. because once it's sewn together, it's permanent. My perfectionism, which at this point normally takes a backseat in my art process, reared its ugly little head and I was stuck. That's when I decided to create loose pages and bind them with rings...flexible and no need to commit...LOL Or is that, be committed :) I have long had this art journal kit thingy in my stash. I bought it ages ago on clearance. It has a hard cover with printed canvas on it and uses a heavy duty shoelace to fasten in the tons of kraft paper pages. The pages themselves are 5.75 x 8.75 inches which is a size I am very comfortable with. I decided to use some of the kraft pages and mix in coffee dyed papers as well as glassine envelopes and whatever else I felt like including. This felt like a good fit for me and all of a sudden, my mojo returned...go me!

I chose not to have a theme...other than black, cream, and kraft as well as vintage items. This book is all about playing and learning. Themes can come later when I have a few more under my belt. Anyway, I have made a few pages filled with fun little details...you know I love that...and am content to carry on until this book is full. It's a different kind of creating than I usually do (although I have thrown in some stencilling and stamping and a few doodled borders...I'm looking to incorporate my own style into these so I will experiment.


The first page I made has a pocket along the side to tuck things into. After inking the edges with Coffee Archival Ink, I stamped with the French text from Bo Bunny It is written stamp and stencilled through TCW Chicken Wire Reversed template. A line was scored 2 inches from the right side and that was folded in and then the card was stitched on 3 sides.


To decorate the pocket, I created a cluster with wide cream cotton ribbon, a folded and stitched length of music paper, and a length of striped fabric which I folded in half. I added crocheted lace and burlap trim along the inside edge and two butterflies punched, tapped with gesso, and inked with Coffee Archival ink. Twine was wrapped and glued to decorate their bodies and make antennae. A small tag was stamped using another of the Bo Bunny stamps from the same set and an Idea-ology rub-on (admit one) was layered over that. Before adhering the tag to the cluster, a frayed edge of cream fabric was hand stitched to the bottom with brown thread...more texture and interest. Once the tag was glued to the bottom of the ribbon, leaving the lower part of the tag unglued, another tuck spot was formed. The bottom of a merchandise tag was inked and tucked into that spot. Threaded buttons were added to the striped fabric loop and also to the small tag.


Two pieces of digital ephemera were printed onto white cardstock and stitched around. They were then inked with Coffee Archival and matted onto black cardstock to give them strength and a pop of black detail. Reinforcements were made for the holes by punching a .25 inch hole and then using a .5 inch punch to cut the circle around it. I don't want the holes to tear with use.


Torn pieces of coffee dyed copy paper were adhered to the backs of the two cards  and stamping was added to each. These will become writing spots for future use...I'm thinking possibly a gratitude journal.


Side two of the same page already had the stitching and inking, as well as the reinforcements, done. Another cluster to form a tuck spot for a tag and ephemera piece was created from book paper folded, glued, and inked. A length of crocheted lace with a narrow lace on top was stitched across the overlapped fishtail flags. A small flower was created by layering two coffee dyed mulberry flowers with three circles of tulle all fastened together with a black brad. This was adhered on the right end of the lace. In the true spirit of junk journalling, a merchandise tag from something I bought was inked and added to the cluster.


Only the top and left side of the larger tag were adhered to the page to allow other things to tuck in there. The prescription paper came from an ephemera pack from Art-C, like the ones Joggles is carrying now. The coffee dyed manila tag was stamped with a map stamp on one side and lace was looped through the hole and tied with hemp.


Both of the reverse sides of the tag and ephemera allow space for writing. The tag was stamped with a line stamp and a tiny TH butterfly sticker embellished the corner.

I'm going to leave off here although I have more pages completed. I'll save them for another post when we're all fresher...LOL. Thanks for popping by today. I'm very excited about this new (to me) creative avenue and will fit it in when time and DT duties permit. It's something I am doing just for me...just 'cuz.

Life is good; so is art.
Bonnie

Tuesday, January 17, 2017

Little Snowmen Book


Hi everyone! Long time, no write! Between being sick for over a month and having some projects to finish which can't be shared yet, I've had very little time to create things I can post. I purchased a whole bunch of sweet snowmen images from Sassy Cheryl's and have been itching to get at them. Snowmen just make me smile! In an effort to use up things from my stash, I decided to do a little mini album featuring these little guys. The chipboard album is 4.25 inches high at the largest point and 3.25 inches at the widest point. It's shaped like a label and was fastened together with a chain but I plan to change that to a binder ring. Above is the cover of the album with Sassy Cheryl's image called Snowman Parts which I thought was the ideal image for the beginning :)


I began by coating both sides of the chipboard shapes with absorbent ground because I knew that I wanted to use sprays and gesso doesn't react well with spray inks. Once dry, I spritzed each side with a combination of two blue spray inks...either Lindy's Starburst Sprays or Heidi Swapp Color Shine. Then Ranger Texture paste was scraped through stencils and once dry, brushed lightly with white acrylic paint to brighten them in places. The Texture Paste absorbs some of the colour from the sprays so the white returns it to the original colour of the paste. A little stamping with Jet Black Archival Ink and various background stamps added more pattern. The photo above is the first page inside the book and features one of Sassy Cheryl's retired images called Man's Best Friend. Don't despair though because there are a whole bunch of other cute snowman images from which to choose.


The images were fussy cut leaving a narrow white border and then matted with black card stock to frame them. Single words from Idea-ology Chit Chat Stickers were matted with black and added to each page to coordinate with each image. Die cut white snowflakes were also added to complete each page. The image above is the second inside page and features the adorable Sassy Cheryl's image called Blinkie's Snowday Dreaming. I love his sweet smile and little friend hopping around beside him.


This is the third inside page and features Sassy Cheryl's image called Admiring the Star. I see him as making a wish upon the first star he sees tonight. On some of the backgrounds, I have outlined part of the Texture Paste stencilled shapes with black pen. On this one, I used an Inktense pencil activated with water. Who knows what I will do next time...LOL

Thanks for stopping by and visiting with my little snowman friends and me. We all appreciate that and hope that you will come back to see the rest of the book and Sassy Cheryl's sweet snowmen. I'm loving this little project!

Life is good; so is art...and snowmen!
Bonnie

Friday, September 16, 2016

Sneak Peek of my Joggles Tunnel Book


Hi everyone. Thanks for stopping by. Have you seen the new tunnel books that Joggles is now carrying? They are fabulous...so sturdy and full of possibilities. The rings are just the right size to keep it from being floppy and misaligned but also leaving enough room for layers of goodness. They come in 6 x 6 inch size with either square or circular graduated openings or 6 x 9 inches with a rectangular opening. Very cool!Today on the Joggles blog I have a full tutorial on the one I just finished creating. I would love it if you popped over there to see it. There are individual shots of each page spread at the end of the post plus an explanation of the process in the first part. I'm excited to hear what you think :)

Hope to see you there!

Life is good; so is art.
Bonnie

Friday, July 22, 2016

Joggles DT Post ~ Sneak Peek


Hi everyone! It's my turn to post a DT project on the Joggles blog so I thought I would give you a sneak peek in a shameless attempt to get you to pop over there and check out the full project. I created an accordion book filled with layers of goodness and starring a sweet little Joggles bird stamp called Tweet Tweet. Besides wearing very quirky hats created from bits of other stamped images, all the birdies have messages for us which just might make you smile. Just sayin' ....

I had an absolute blast creating this project and would love to share more...oh that's right, I did...over on the Joggles blog. See you there!

Life is good; so is art.
Bonnie

Thursday, September 24, 2015

New RSD Altered board book


Hi everyone! I haven't made an altered board book in what seems like ages and I had an idea that I really wanted to play out. The theme of this board book is Someone's in the Kitchen with Dinah and it's going to feature one of Rick St. Dennis' morning goddesses and some kitchen monsters/robots because that's who is in the kitchen with Dinah! How fun is that! I began with a child's board book which I sanded and coated with gesso. before applying the second coat of gesso, I glued some washi tape to the center seam of each page to prevent the gesso cracking as the book is bent. The tape stays flexible so no cracks appear.


For the first two page spread, I decided to invite Sugar Monster into the kitchen. I coloured him with a mix of Prismacolor and Polychromos pencils. Then Sugar was fussy cut leaving a narrow white border before he was matted with black cardstock and trimmed out again. Foam tape was added to the back of him for dimension when he was added to the background.


The background began with London Blue and Crushed Grape Dylusions paint brayered onto the gessoed background. Gesso was scraped across the dried paint with a palette knife. Once that was dry, Forget-Me-Not Archival ink was stamped onto the background using a cross-hatch stamp. A little while ago, a friend gave me these fabulous vintage Woman's Day magazines from the early 1950s. They are so cool, filled with wonderful old ads. I thought it was be so cool to use them as a background for these kitchen themes pages. I tore out three plus a recipe and adhered them to the journal pages with gel medium. Inktense pencil activated with water was used to shade them and black outlining was added. A little stamping was added on top in a few places to embed these ads.


Black stencilling was sponged on next using Jet Black Archival ink and TCW's Mini Texturized stencil. Using another pattern from the same stencil, white embossing paste was scraped through the circles with a palette knife. Music washi tape was adhered to cream cardstock and applied to give Sugar a place to stand. Another little section was added to the other page at the top to create repetition. Memory Box Sketchy Rings die was used to cut black cardstock twice. One was layered  onto each page...love that die! Sugar was popped up onto the left side.


The sentiment which was computer generated  and printed on white paper was matted with yellow spritzed paper and then black cardstock  before being adhered to the background. To finish the spread, a border was doodled with black pen and the circles filled in with white paint pen. Doodling and rub-ons were added and three enamel hearts adhered to the top left corner to balance out the design. Black Big Brush pen was added to the edges of the book as a final touch.

Thanks for joining Sugar and me today in Dinah's kitchen. Stay tuned until next Thursday when another character (or two) from this altered board book will be visiting.

Life is good; so is art.
Bonnie

Tuesday, June 16, 2015

Coffee Monsters Board book ~ The Finale


Hi everyone. Today I am sharing the last spread and front /back covers of the altered board book I have been working on using Rick St. Dennis' cute monsters available from his Zibbet shop.. The theme for this book has been coffee monsters and I have had so much fun creating backgrounds and matching monsters and coffee sayings.


The last spread of the book features Fworki who I coloured with Prismacolor and Polychromos pencils. I cut a balloon out of pink cardstock and used letter stickers so that it better suited the theme. Fworki was then fussy cut leaving a narrow white border and then matted in black cardstock.


The coffee mug was cut from vintage French text using Rick's Pencil Cup image as a template. It was coloured with Vintage Photo Distress ink and then shaded with an Inktense pencil activated with water before being matted in black. The sentiment was computer generated, matted in black, and adhered to the mug. Scraps of burlap, washi tape, and embossing paste stencilled black were layered under the mug. Steam was created with doodles and coloured heart shaped clips.The background was created by adding Vintage Photo Distress ink through TH Splatters stencil onto the gessoed background. More was added to frame the edges. The word Now was also stamped on the right side around where Fworki would be adhered. A border was doodled with black pen and the letters for Coffee were placed close to the middle fold. Black Big Brush pen finished off the page edges.


The front and back covers started with Dark Chocolate and Titan Buff acrylic paint  sponged onto the pre-gessoed pages.Bubbles were stamped with Coffee Archival ink and coffee rings with Jet Black Archival. Layers of doily, burlap, and raised bean paper as well as coupon tickets were adhered on each side to form the background and set the scene.


The image, Coffee Monster which Rick created especially for this project (so cool), was coloured with Prismacolor and Polychromos pencils. It was fussy cut leaving the narrow white border and matted in black before being popped up on foam squares. real coffee beans were added to the vignette with Glossy Accents. The book title, Gimme Coffee, was created with Idealogy Alpha Parts and mini scrabble letters.


The mug on the back was sprayed with Lindy's Stamp Gang Delphinium Turquoise and shades with an Inktense pencil activated with water. Vintage Photo Re-inker was dripped from the rim of the mug to create a messy cup. The mug was then matted in black along with the sentiment was matted. More beans were adhered to the back so that when the book is open and on display, the front and back read as one. The final touch was to ink the edges with black Big Brush pen.

Thanks for joining all of my coffee monsters and me today. We have enjoyed your visit and hope that you've enjoyed getting in touch with my inner coffee monsters. I'm happy to be finished...a few more projects are already percolating in my brain. See you soon.

Life is good; so is art.
Bonnie

Tuesday, June 09, 2015

Coffee Monsters ~ RSD Altered Board Book


Hi there! I completed the next three page spreads in my Coffee Monsters children's board book using images from Rick St. Dennis' Cute Monsters. That just leaves me with one more spread plus the front and back covers. Love these little guys and their fun messages. The first of these three features Tworki who needs to apologize for things said pre-coffee. We can all relate to that, I'm sure. Tworki was coloured with Prismacolor and Polychromos pencils, fussy cut leaving a narrow white border, and then matted in black.


The background began with adding black gesso to the pages, followed by burlap and patterned paper. Splatter dots and coffee rings were stamped onto the background layers with Jet Black Archival. Washi tape was added to white cardstock to brighten the colours and then adhered to the background of both sides. A corrugated heart was die cut from a coffee sleeve and the page was then balanced with puffy heart stickers in the opposite corner.


The coffee cup from Rick's pencil cup image was used as a template to cut one from French text paper. It was inked with Tattered Rose Distress ink and brown Inktense pencil. The sentiment was inked around the edges with Vintage Photo Distress ink. More of the little puffy hearts were added for the steam. The coffee title was spelled out with chipboard circles.


The next two page spread features Fwiver who needs to be surrounded by Caution tape because he is unsupervised and filled with coffee. Tworki was coloured and fussy cut like his friend, Tworki.


The background was done with brown and caramel acrylic paint applied to the gesso background with a brayer. Rectangles of dark brown corrugated cardstock as well as the embossed coffee bean paper which I used on an earlier page. Two little orange tickets were stamped with the word Sorry and tucked into the coffee cup cluster. Two copies of a server's pad were reduced and layered behind Fwiver. Pieces of die cut border were added around the edges of the two pages.


The sentiment was printed on white and matted with black cardstock before being added to the coffee mug. White paint dots were added to brown sticker letters to create the title.The mug was coloured with Peeled Paint Distress ink and green Inktense pencil activated with water. Caution washi tape and a small green cup brad, plus a doodled border finished off the spread.


The last spread features Screaming Me Me who is quite upset about spilled coffee. He was coloured and matted the same as the other two.


The background began with splotchy designer paper being adhered to the gessoed background. Vintage Photo re-inker was dripped along the top edge and down the pages (spilled coffee, after all). Additional pattern was added with Tree branch Archival ink and a drip stamp from Ryn and a grid patterned stamp. Coffee bean patterned paper was torn and added to each page. Torn paper towel was added behind the mug, as well as under Me Me. Bits of that same die cut border were adhered under the mug and on the right edge of the spread.


The mug was coloured with Mustard Seed Distress ink and a light brown Inktense pencil. Steam was added in the form of clock hands. The sentiment was inked around with Vintage Photo Distress ink before it was matted with black. The title was added with stickers and outlined with black pen.To complete the pages, a border was doodled, a cup buttton and metal spoon, and a pair of heart stickers were added.

Thanks for joining Tworki, Fwiver, Me Me, and me today. Stay tuned for the final installment of these posts about the Coffee Monsters. I'm excited to see it finished!

Life is good; so is art.
Bonnie