Thursday, October 30, 2014

Hester's Pantry ~ an RSD assemblage piece


Welcome to day 30  of the 31 days of Halloween organized by Smeared and Smudged, This is my final turn to post on the Airless Chambers blog for this event.


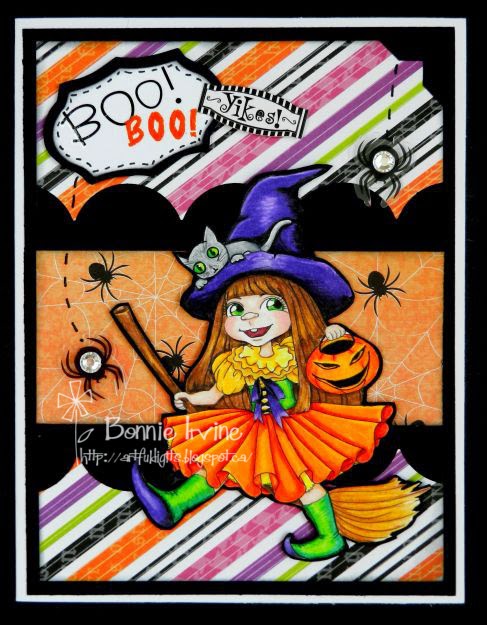
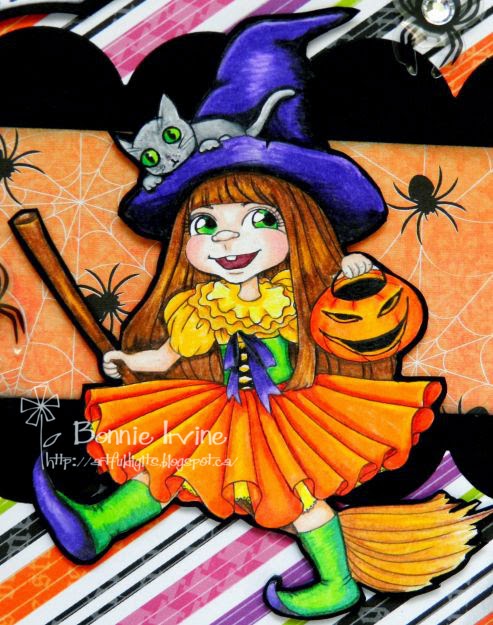
I chose to play with Hester Hoopgarten creating her pantry cupboard. Hester can be found in Rick St. Dennis' Zibbet shop. I coloured Hester and her little scorpion friend with Prismacolor pencils, fussy cutting them while leaving a narrow white border. The image was then matted on black cardstock and cut out again, giving it more strength. Hester needed that so she could remain unbending and inflexible...as usual.


Hester's cupboard is a masonite hutch shrine from Coffee Break Designs. It measures 4.5" tall by 2.75" wide and 1.25" deep.The insides were all covered with Halloween paper scraps adhered with matte medium. Once it was glued together, the outside was covered with a spider web designed paper and the raw paper edges were inked with a black Big brush pen. A drippy border was die cut from red and black cardstock which were offset to create a shadow and greater contrast. A spider web was die cut from black cardstock and then painted with Clear Wink of Stella before being trimmed and adhered to the upper right corner.


Because this is Hester's pantry, two larger and three smaller bottles were stored in it with such yummy ingredients as Spider Legs, Bat Blood, Slime of Snails, and Foul Breath Mints (Vectoria Designs labels). A skeleton hand was adhered to the top of the hutch with Glossy Accents and Hester's message, Want me to spell it out for you, was printed on handmade paper. The message was then torn around (we don't give Hester sharp objects like scissors) and inked with Vintage Photo. Beware! She means business.

Thanks for visiting Hester Hoopgarten, her scorpion, and me today. The 31 Days of Halloween is nearly over...it's been a scream!

Life is good; so is art.
Bonnie

Tuesday, October 28, 2014

Halloween Pals ~ RSD tag


It's day 23 of the 31 days of Halloween organized by Smeared and Smudged and my turn to post on Rick St. Dennis' Airless Chambers blog.


I chose to create a tag for my Day 28 project featuring the RSD image Halloween Pals which can be found in Rick's Zibbet and Etsy shops. This madcap crew makes me smile big time! They look like they are having such fun. I coloured them with Prismacolor pencils and then fussy cut the image with a narrow white border to help it stand out against the background. It was then popped up on foam tape for a little dimension and shadow.


The background began as a black #8 tag which I matted in shimmery orange cardstock after adding washi tape to the bottom edge. The hole at the top was covered by a star sticker and black grosgrain ribbon with white stitching was added to the back as a topper.


The sentiment was computer generated. It seemed appropriate since I really do drive a stick shift and am always amused by people's reactions. The other sentiment I almost went with was "Dance Like No One is Witching". The edges of the sentiment were inked with Dried Marigold Distress ink to grunge it up a little and continue the orange throughout the tag. The little bat is holographic so it changes colour as the light shifts and adds a fun bit of shine to the piece.

Thanks for visiting the Halloween Pals and me today. We appreciate your fine company.

Life is good; so is art.
Bonnie

Monday, October 27, 2014

Pumpkin Kitty ~ CYP Challenge # 237


Hi everyone! Well, it's Halloween week and I'm sure there are a whole lot of last minute costume adjustments and candy buying going on this week. We never buy our candy too early because then we have to buy it twice. It seems to evaporate from the cupboard...somehow! Our challenge theme this week at Craft Your Passion is "Trick or Treat...Give Me Something Good to Eat". We want to see Halloween themed projects featuring sweets or food somewhere. It could even be Halloween treat packaging.


AuroraWings is our wonderful sponsor. I love Mitzi's artwork so this was a treat in itself. I chose to play with this adorable Kitten in a Pumpkin image, using my own kitten as a model...lol. Not that he would stay this still ...he's a bit of a Tasmanian devil from the cartoons I used to watch :) I coloured the image with Prismacolor pencils using short choppy strokes for his fur. Then I fussy cut him and added black matting to  help frame him. Halloween Love!


The background of the card began with a white base and black cardstock cut to fit inside it leaving a white border. A scrap of orange patterned paper was cut into three rectangles all the same size and allowing for a black border around and between them.The bottom edge of each section was given a scalloped border punched from black and the other three edges were faux stitched. The sentiment which was computer generated and coloured in with an orange marker was matted in black, edged in Dried Marigold Distress ink, and faux stitched. Both the image and the sentiment were popped up on foam tape.


The top of the card was embellished with three tiny chipboard flags threaded with orange twine. The bottom section was wrapped with the same twine and then a large orange button with a smaller black one stacked on top was added where the twin crossed. A pretty simple card design but when the image is this gorgeous, I like to let it be the focus with few distractions.

Thanks for stopping by to visit with Kitty and me. We love that! When you get a moment, pop over to the Craft Your Passion Challenges blog to see the fabulous designs by our talented DT and to welcome our awesome new members. We'd love to see you join us with your Halloween projects featuring food. Yum!

Life is good; so is art.
Bonnie

Thursday, October 23, 2014

Something Went Bump ~ an RSD art journal page


It's day 23 of the 31 days of Halloween organized by Smeared and Smudged and my turn to post on Rick St. Dennis' Airless Chambers blog.  I decided to create an art journal page starring the lovely and glamourous witch from Rick's image, Something Went Bump which can be found in his Zibbet shop. I coloured her with Prismacolor pencils and fussy cut her leaving a narrow white border. She and her friends were then matted with black cardstock and popped up on foam tape.


The background started as a rectangle of mixed media paper which takes all of the layers of colour without causing a fuss. The background was first scribbled on with orange and red Neocolor II watercolour crayons, activated with a wet brush, and then repeated. Red Cherry, Tangerine, and Lemon gelatos spread with my finger were used to deepen the edges and random areas.


Jet Black Archival ink was applied to the background through the TH Shattered stencil and was also used to stamp the spider web on both sides. White gesso was pounced through TCW's Harlequin stencil and a black Stabilo pencil was used to shade on the left of each diamond. The word Boo was stamped onto the open spaces with Red Geranium Archival ink. Harlequin washi tape was added under our lovely witch to ground her and a wee remnant was also added to the right side in order to bring that pattern to the top of the piece.


The sentiment, What doesn't kill you only makes you STRANGER, was computer generated and printed onto white cardstock. It was then trimmed and matted in black before being popped up on foam tape. Cheesecloth was added under the section at the top. Two threaded buttons and a spider were added to the project before black matting was adhered to the back, serving as a contrasting frame.

Thanks for popping by today. Hope this gave you a smile. I know it did for me...not to mention fashion ideas galore!

Life is good; so is art.
Bonnie

Monday, October 20, 2014

Halloween Hopes ~ CYP Challenge #236


Hi there! It's Monday and that means a new challenge at Craft Your Passion Challenges. Our theme this week is BINGO and our sponsor is the wonderful Zap Pow Designs. Their quirky characters are so fun! To play along with this challenge, choose a line either vertically horizontally or diagonally and add those three items to you project.


 I chose to play with Vlady Bat, colouring him with my Prismacolor pencils and then fussy cutting him. Black and white half pearls were added to his eyes and once he was adhered to the background, shading was done with a Stabilo pencil and activated with a waterbrush.


The background is a page from Recollections' Witch's Dust Halloween  collection. It was trimmed to fit inside the white card base and matted with black cardstock. Vlady and some of his die cut friends were adhered to the forest paper. Doodling and red gems eyes were added to the bats Two lengths of gray dotty grosgrain ribbon were added to the right side and a punched circle of shimmery yellow cardstock was added for the moon after being trimmed to fit. Faux stitching added some fun detail to it.


The sentiment was computer generated, printed on white cardstock and matted with red and then black. It was faux stitched and then popped up on a double layer of foam tape. Threaded buttons were added to the ends of the sentiment element. That completed the middle vertical column on the Bingo Board: buttons, image, gems.

Vlady, his posse, and I thank you for stopping by today. When you get a moment, pop over to the Craft Your Passion Challenges blog to see the rest of the fun BINGO projects by my talented teamies. Then pick a line...any line and join in the fun!

Life is good; so is art.
Bonnie


Sunday, October 19, 2014

Chester Christmas ~ RSD October Showcase project


Hi everyone! We are beginning a new monthly feature on Rick St. Dennis' Sparkle and Glitter blog called the Showcase. Rick will choose a monthly theme and members of the EDT will choose an image from his huge collection and they will be showcased together on the Sparkle and Glitter blog. Today for the October Showcase, the theme is Christmas or Creepmas.


I chose to play with Chester Christmas who can be found in Rick's Zibbet or Etsy shops. I coloured Chester (so cute!) with Prismacolor pencils, accenting the bell and Christmas ornament with Wink of Stella. Chester was then fussy cut and matted in black before being popped up on foam tape.


A scrap of golden yellow snowflake paper was cut into a rectangle that once matted with black would fit inside the card base leaving a white border. A frame was cut from green plaid designer paper and was matted on the inside with black. This was adhered to the golden coloured layer and both were faux stitched.


Gold coloured stars were cut out in a primitive shape, matted with black, and accented with Wink of Stella. They were popped up on two layers of foam tape and a half pearl was in the center of each. Merry Christmas tickets were printed and fussy cut before being adhered at the bottom edge of the card. The strip of tickets is both the sentiment element and it grounds Chester, giving him a place to stand. To complete the card, three enamel dots were affixed to the top right of the card.

Thanks for stopping by today. Chester and I are happy as heck that you did that. To check out the other wonderful October Showcase projects, pop over to the Rick St. Dennis Sparkle and Glitter blog.

Life is good; so is art.
Bonnie

Friday, October 17, 2014

Bite Me ~ a Rick St. Dennis image


It's day 17 of the 31 days of Halloween organized by Smeared and Smudged and my turn to post on Rick St. Dennis' Airless Chambers blog.


For today's post, I created a Halloween card using one of Rick's newer images, Freddy Fullmoon. Freddy is available in both Rick's Zibbet and Etsy shops. I coloured him with Prismacolor pencils, enjoying every moment colouring those fabulous cape folds. Freddie was fussy cut leaving a narrow white border to allow him to better stand out next to the black background. He was then popped up on foam tape. He waited patiently like a well mannered vampire should.


The background began as a white card base with a black rectangle cut to leave a small white border of the base showing. This repeats the white around Freddie and seems to frame the card keeping the eye on the design. The drippy blood border was cut with a Frantic Stamper die. It was inked with Black Soot Distress ink, adhered to the top edge, and faux stitched for greater interest. Black circle tiles with the numbers and st printed in white were adhered just below the drips.


Two strips of washi tape were first adhered to white paper and then to the bottom of the card, giving Freddie a place to stand. Backing the washi tape with white creates a stronger pattern than you would see if the semi-transparent tape was placed directly on the black background. Two half pearls were added to the straight ends. The final touch was to print the sentiment, Bite Me, on white cardstock, edge the words with Black Soot ink and then layer them over a red die cut heart. This brings the red all the way through the design and helps the eye travel from corner to corner.

Thanks for hanging out with Freddie and me today.

Life is good; so is art.
Bonnie

Wednesday, October 15, 2014

Boo! ~ The East Wind Challenge #17


Hi there! Well, with Canadian Thanksgiving over for another year, can Halloween be far behind?The stores are gearing up for Christmas already! Now that's scary :) Our theme this time at The East Wind is The Spooks Come Out at Night and you can interpret that as cute spooks or ghoulish ones...whatever floats your boat. I have been chomping at the bit to colour this adorable Aurora image from The East Wind, Baby Aurora A Witch and a Black Cat and this seemed like the perfect opportunity.


I coloured the two of them with Prismacolor pencils, making my cat gray like the newest member of our family, Parker. Once Aurora and Parker were coloured, I fussy cut the image and matted it with black cardstock before popping it up on foam tape.


The background began by matting a piece of DCWV paper with black cardstock cut slightly smaller than the white card base. A spider paper from the same stack was cut and matted to fit horizontally over that rectangle. Two borders were die cut (MFT) and layered on either side of the spider paper and Aurora was popped up on top of the layers. A black corner was punched and adhered to the top right of the striped paper. Two spider stickers with gem bodies were adhered to the background and dashed web lines doodled in to suspend them.


The boo sentiments were rub-ons transferred to a die cut and matted white label. Another sticker which says Yikes! was attached to the first sentiment so that it overlapped it slightly. This is a simple design which I tend to favour, allowing the image and the contrast between vibrant colours and black to do most of the "talking".

Thanks for joining Baby Aurora, Parker, and me today. For more wonderful inspiration, pop over to The East Wind Challenges blog to see the fabulous creations of the rest of the DT. We are looking forward to seeing what you come up with. Hope you join us!

Life is good; so is art.
Bonnie

Monday, October 13, 2014

Fall Hopes ~ CYP Challenge # 235


Hi everyone. Happy Thanksgiving to my fellow Canadians. We have a new theme at Craft Your Passion Challenges...Where There's Hope. We would like to see projects that relate to hope, encouragement, or love. Our wonderful sponsor is one of my favourites, A Day For Daisies. I love the whimsy and innocence of these images.


I chose to play with one called Fall Fun, colouring it with Prismacolor pencils. The image was then cut with a Spellbinders die and Distress inks (Tumbled Glass and Peeled Paint) were used to colour the sky and grass using a blending tool for the application. The image was matted with black cardtstock.


The background began with a black rectangle cut to fit inside the white card base. Rectangles of fall coloured papers were cut to fit the rectangle leaving black space between and around the coloured ones. Various embossing folders were used, one per colour, to add texture to the coloured rectangles before they were adhered to the background. The image was then layered over the design.


To complete the front of the card, two leaves cut with TH Tattered Leaves die from corrugated cardstock and a mop up sheet of mixed media paper were added to the top of the card. Distress Inks were used to deepen or add colour to each leaf. Three small enamel dots were adhered to the top right corner of the card. Four small maple leaves were punched from shimmery yellow cardstock and added beneath the image. Tiny letter stickers spelling FALL were added to the leaves. Below is a photo of the inside of the card where the Hope theme comes together.


Thanks for stopping by today. I do appreciate that! When you get a chance, pop over to the Craft Your Passion Challenges blog to see the Hope projects from the rest of my talented teamies. We look forward to having you join us this week.

Life is good; so is art.
Bonnie

Friday, October 10, 2014

Madama de la Noche ~ RSD image


On Rick St. Dennis' Airless Chambers blog, it's day 10 of the 31 days of Halloween organized by Smeared and Smudged and it is my turn to post.


I chose to create a Day of the Dead tag using the RSD image, Madama de la Noche which can be found in Rick's Zibbet shop. As a Canadian, I was not familiar with Day of the Dead celebrations until recently when I did a little research to satisfy my curiosity. I thought it was similar to our Halloween but it really isn't at all. Instead, it is a day to remember and celebrate our loved ones who have died and to entice them back for a reunion.


To begin, I coloured Madama de la Noche with Prismacolor pencils, fussy cut her, and popped her up on foam tape. The moon was a circle punched from watercolour paper and inked with Scattered Straw, Spiced Marmalade, and Picked Raspberry Distress inks. A scrap of cheesecloth became the mysterious cloud partially covering the moon. The headstone comes from a tag download from my stash.


The tag background which was black to begin with was given a white checked border with white paint pen and white gesso. Black gesso dots were added to the centers of the white spaces. Grass was cut from green cardstock with a Joy Crafts die and then deepened with Mowed Lawn Distress ink.


When I was reading about the symbols of the Day of the Dead celebration, I discovered that marigolds are usually included in the decorations because their scent draws the deceased back to earth for the reunion celebration. I included some tiny punched "marigolds" at the bottom of the headstone and a larger one to decorate the ribbon topper.

Thanks for joining Madama and me today. I had a blast creating this tag.

Life is good, so is art.
Bonnie

Wednesday, October 08, 2014

Step Off the Path ~ eP sneak peek


Hi there! It's my turn to post on the eP blog today and I created a fun mixed media canvas featuring a Wendy Vecchi sentiment and two of Dina Wakley's Scribbly Birds. If you want to see more than this little sneak peek, you'll have to visit the eclectic Paperie blog.
Hope you will!

Life is good; so is art.
Bonnie

Monday, October 06, 2014

You Are My Happy! ~ CYP Challenge 234


Good Monday to you! There's a brand new challenge theme at Craft Your Passion...use fabric or material on your project. Our wonderful sponsor is The Sailing Pineapple which carries both digital and rubber stamps...such cute ones, too. I have chosen to play with Oscar the Cat whose quirkiness I adore. He just seemed to cry out for funky bright colours and is a male who is not afraid to be seen in pink! I coloured Oscar with my Prismacolor pencils before fussy cutting him and adhering foam tape to his underside. He comes with lovely black lines so I did not mat him in black but merely sharpened up the lines I had coloured over.


The card base is white so I layered pink designer paper edged with Picked Raspberry Distress ink and faux stitching over the white. next I used a heart embossing folder on a purple cardstock rectangle which I matted with black. Over the purple, I adhered a rectangle of burlap (my fabric element) which I had frayed on all sides.


To complete the design, three different fuchsia coloured buttons were threaded with the unravelled burlap strings and adhered to the edge below Oscar. A sentiment from Create With TLC was printed on white cardstock, cut with a circle die, and matted in pink. The edge of the pink layer was inked with Picked Raspberry and the white circle was faux stitched. The sentiment was popped up on foam to give it dimension and shadow just like Oscar.

Thanks for visiting Oscar and me today. This card could very well apply to you because when you visit, you are my happy, too. When you get a moment, pop over to the Craft Your Passion Challenges blog to see the awesome projects by my talented teamies. We would love to have you join our Add Some Fabric challenge. Hope to see you there!

Life is good; so is art.
Bonnie

Sunday, October 05, 2014

Ghoultide Witches ~ RSD 31 Days of Halloween


Rick St. Dennis' EDT is participating in the 31 Days of Halloween which is a fabulous blog hop run by Smeared and Smudged Forum. There is incredible inspiration every day of October. Our team is posting our Halloween creations on the Airless Chambers blog and today is Day 5 and my first day to post.


I chose to create a card using the amazing Willaworm Witchypoo image which can be found in Rick's Etsy and Zibbet shops. I tend not to colour gory, ewwy images but I love Rick's creepy yet humourous ones and Willaworm certainly qualifies. She and her entourage were coloured with Prismacolor pencils and fussy cut leaving a narrow white border for better contrast with the background. To me she looks slightly startled and I'm wondering if she has just seen someone sporting the same outfit or accessories as her at the Witches' Ball. I hate when that happens!


A little Black Soot inking and black doodling on the Recollections Witches' Dust paper, a bejewelled spider sticker and a simple punched one completed the card background. The die cut spider webs (Papertrey ink) adhered as a border along the side and the computer generated sentiment completed Willaworm's new home.

Thanks so much for visiting today. Willaworm and her posse appreciate it too.

Life is good; so is art.
Bonnie