
Holy Toledo...here she goes again with all those words and pictures!!
You need to pack a lunch to get through this one :0

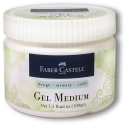
It's time for May's eTeam Picks Challenge at eclectic Paperie. The eTeam Picks Challenge is held on the third Thursday of each month and each challenge is an opportunity for you to be inspired by one of our eTeam’s creations, to share your work, and to be entered into our challenge prize drawing. It's Julie's turn to host this time and she has chosen a product, Gel Medium, for her theme. There are so many ways to use it in a project. I often use it to adhere paper to canvas or in my art journal so I was looking for something different. I chose to feature an image transfer on my canvas, something I have never done before (I live in a very sheltered world...LOL).

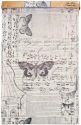
I printed an freebie image from my computer stash...wish I knew where I got it from. It's a lovely vintage image of a little girl which I printed on my ink-jet printer. I fussy cut her and applied a generous coat of gel medium to her sweet face before adhering it to the canvas. I then brayered it for a few minutes and left it to dry for about 1.5 hours. At that point, I used water and my finger to gently remove the backing paper from the image so that all that was left was the ink. This type of transfer gives you an imperfect hazy image which looks a little distressed. I added to that when I got a little over-zealous with my rubbing of the image and rubbed away a chunk of her hair, ink and all. Oops!

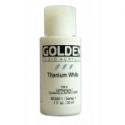
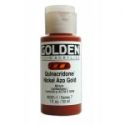
I started the background around the image by painting it with Golden Titan Buff acrylic paint watered down slightly to make it more transparent. Next I mixed Golden Quinacridone Nickel Azo Gold paint with Acrylic Glazing Liquid and applied a glaze over the Titan Buff. While it was still wet, I layered a length of plastic wrap over the canvas and smushed it (technical term) to get wrinkles. I let it dry for 20-30 minutes before pulling off the plastic wrap and then heat zapped it.

You get these awesome creases and patterns allowing some of the undercoat to show through. I repeated the process twice more once with DecoArt Traditions Quinacridone Burnt Orange plus Glazing liquid, and the final time with Americana Dark Chocolate and water. The background was so cool, I didn't want to cover it :)

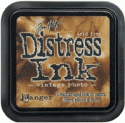
I adhered Idea-ology Melange Tissue Wrap to the top of the frame and a small chunk to the bottom using gel medium. Once dry, Vintage Photo Distress stain was applied over the tissue and spread with my finger.

To create more texture, watered down white gesso was applied to this lovely textured foam sent by our friend and team-mate, Micki. It created such a fun texture in random places...you can see it best over the tissue wrap at the top.

I had a piece of lace and the zigzag die offcut sitting on my desk, volunteering to join the party so they were adhered under the girl with gel medium. Hmmm, need...more...texture. I cut a small chunk of beige burlap into two tabs and applied some of the leftover paint on them with my finger. They were adhered to the canvas with Scor tape and little metal buttons were affixed to the points. Brown paint and white gesso rings were added in several places making sure to overlap some of the elements to embed them into the background. Three slivers of washi tape were added to the top left and bottom right sides

Hmmm, need...more...metal :) The buttons looked lost without other metal elements to carry the eye around the canvas. I added an Idea-ology metal corner to the top left.

An Idea-ology ornate plate, backed with burlap and cheesecloth sprayed with Melted Chocolate Dylusions spray ink, was added beside the girl with an Idea-ology metal heart below it. The word love was spelled out in stickers inside the ornate plate.

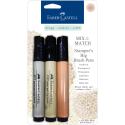
The other metal piece is also from Idea-ology. It's a metal phrase tab which has seam binding threaded through the holes and wrapped to the back. The words were inked in with White Big Brush pen which was wiped off the flat part (mostly) but left in the letters to age the piece. Little dots were placed under each point of the zigzag paper, again using the white Big Brush pen. Love the coverage of this pen. Doodling was done around the edges with a sepia Micron pen, around the image and some elements with a Brown Big Brush pen, and on the zigzag with a gray Big Brush pen. Vintage Photo Distress ink was applied around the canvas edges to create a frame effect.
I had no idea when I started where this piece was going. I only knew that I wanted to try an image transfer. Beyond that, it just sort of evolved from playing. Lots of products, messy fingers, and a willingness to trust the process...somehow it always works. Thanks for hanging in for this super long post. One thing about mixed media...there's usually lots of splainin' to do. Make sure to pop by the eclectic Paperie blog to see Julie's fabulous inspiration project and video. By clicking on the Linky thumbnails that say DT, you'll be able to see what the rest of the team has created, too.
Below are links to products I have used on this project which can be found in the eclectic Paperie store.
Life is good; so is art.
Bonnie

 18px;">
18 comments:
Such a lovely image, and she's so hauntingly ethereal in the transfer technique! The rest of the canvas is just fabulous - I love the rich golden tones, and your wrinkly technique has created a real masterpiece of a background... big WOW!
Alison x
She's a beauty...I acclaim your first gel medium transfer a success. Beautiful colors and fabulous embellishments all add to make a wonderful composition.
I love your golden hues and the aged effect over all. That transfer technique is intriguing.
Beautiful, Bonnie! I love the image that you transferred...looks so great as the main image on your piece!
Bonnie this is splendid and you have no idea how much I appreciate your instructions. I am really not technique oriented at this point but want to learn. I found you instructions very easy to follow - I think!! Watch me make a muck of it all!!
Sandy
The image transfer is stunning and I truly love the background you created. I thoroughly enjoy reading how you create your masterpieces and this one is no exception. Love it. Hugs, Anne x
Hi Bonnie, what a stunning canvas! Thank you so much for sharing the steps you make in the making process. Hugs Frea
I love it. Love that color result, so rich and warm and I love how you just kept going even though you had no idea....that is so me. The transfer turned out great. The whole canvas is awesome.
The background with the plastic wrap is uber-cool! Never played with gel medium. There are so many interesting products out there. Almost bought some gelatos today but I have parts and pieces of a mini album spread all over the table so I don't want to distract myself. LOL Another awesome mixed media project from you Bonnie. Hugs!
Bonnie this canvas is amazing! I love the image you transferred, it looks so pretty! And all the great texture techniques you did with paint and other mediums make it just gorgeous! Fabulous project!!
This is gorgeous, Bonnie! Love that rich background and all the fun elements you've added... super texures!
it's beautiful, I absolutely adore the background coloring. Such a rich color and the girl in the picture is so sweet, I also have her stached away in my dropbox. Couldn't tell you either where I got her.
Owww lala!! I just love this project. Soooo full of texture and beauty :-)
cool piece Bonnie! Love the color and the burlap adds awesome texture. That metal phrase tag is one of my favs - my girlfriend made me a bracelet out of it.
I want to learn how to do that transfer !! Must it be a laser printer? or is an inkjet print okay to use?
Am I ever glad that you asked that question! I actually did print this on my inkjet printer not laser like I had originally written. It works well with either. I will definitely be doing this transfer technique again. It wasn't scary like I thought it would be :)
Fabulous, Bonnie! I love all the textures and the dreamy look of the image!
Playing catch up here...Bonnie it is beautiful..love the transfer and your smushed technique!!
Big hugs
Tracy
xoxox
Post a Comment