Thursday, March 21, 2013
eTeam Picks Challenge Sneak peek
There's a new eTeam Picks Challenge beginning today at eclectic Paperie and I get to be the host...I'm excited. The eTeam Picks challenges begin on the third Thursday of each month and is all about inspiration and having fun! During each challenge one of the eTeam members will share a topic, word, technique, sketch, or product that will become the foundation for your creation.This challenge is all about mixing it up and just enjoying the creative process... anything goes! We want to see your work and hear about your inspiration. All of those who play along with our challenge will be entered into a prize drawing for a $15.00 gift certificate to the eclectic Paperie store.
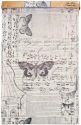
If you are curious about the theme I chose for this challenge or wondering what the photo at the top of this post is all about, you will have to pop over to the eclectic Paperie blog to get the scoop. This piece is only a portion of my project. I had so much fun with this one. I'm really hoping that you will play along. See you there!
Life is good; so is art.
Bonnie
Wednesday, March 20, 2013
Easter Eggs
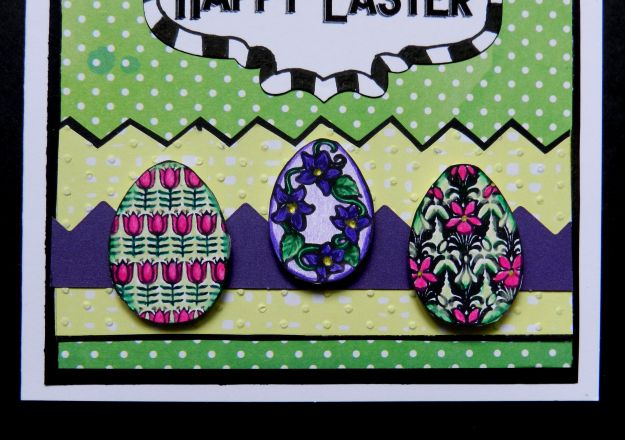
One thing about the Easter eggs on this card...it doesn't take much of a hunt to find them. The bad news, though, is they aren't chocolate. However, they are colourful. I used three different Stamp N Plus egg images to create this card: Tulip egg; Violet egg; Orchid egg. All three stamps were inked with Memento Tuxedo Black and coloured with Prismacolor pencils before being fussy cut and popped up on foam dots.
The green dotty paper comes from an Amy Tangerine stack. The yellow paper was embossed with the Swiss Dots embossing folder before being cut with a punch and matted in black cardstock. The purple trim pieces came from my stash. The bits of bling were Dollar Store finds and have flat pearls inserted into their middles. The sentiment was computer generated, cut out with a Spellbinders jar label and given a hand doodled border with Micron pen. Black matting was placed under the green rectangle before it was mounted on this 5 x 5.25' card.
This card was another opportunity to group similar stamps to achieve greater impact. They would also be cute on twinchies. Anywho, thanks for visiting. You know I appreciate that.
I am entering this card in the following challenges:
Celebrate the Occasion ~ #104 Happy Easter
Oldie But a Goodie ~ Easter (everything on the card with the exception of the black and white cardstock is older than 6 months...yay!)
Shopping our Stash ~ #94 Easter or Spring (Nothing is new here!)
Life is good; so is art.
Bonnie
Monday, March 18, 2013
Have a Yummy Birthday! (CYP)
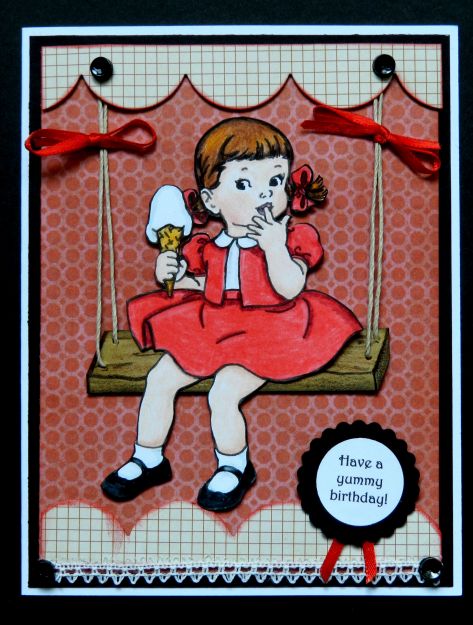
This week at Craft Your Passion, our challenge theme is Ribbons and/or Lace. I was able to work with another fun vintage image from The Sugar Kissed Cottage called Ice Cream Girl. She reminds me of the wonderful illustrations from vintage primary school readers. I just love the look on her sweet face and her adorable little outfit. I coloured her with Prismacolor pencils, cut her out, and then as usual, ran black Pitt pen around the edges so the white edge didn't distract from the image. It also hides any cutting bloops!
The background paper from K & Co.'s Wild Raspberry stack was matted in black to make it pop. The scallop border was cut from MME's Traveller stack using the MFT big scallop die and then edged with festive berries Distress ink. before adhering the borders to the top and bottom of the card, a swing for the l'il missy was hand drawn on kraft cardstock, cut out, and coloured with prismas. Two holes were poked through each end and fine twine was used for the swing supports. The swing was popped up with foam tape, as was Missy. Narrow red ribbon was tied in bows to accent the twine.
To further address the theme, a length of narrow lace was adhered to the bottom edge of the lower scalloped border. Four black buttons threaded with black floss were glued to the two borders. The sentiment was computer generated, cut out with a 1" circle punch, and matted with a Spellbinder-cut scalloped circle. Two short pieces of the satin ribbon were used to continue the ribbon theme and make the sentiment look like a prize ribbon.
Thanks for visiting with Missy and me today. Be sure to check out the projects made by the rest of the DT on the Craft Your Passion Challenges blog. They have done a wonderful job exploring the Ribbons/Lace challenge theme. We'd love to have you play along and look forward to visiting you.
I am entering this card in the following challenges:
Emma's Crafty Challenge (Emma's Cards UK) #14 ~ Vintage
One Crazy Stamper ~ March Anything Goes
Allsorts #198 ~ As Easy As 1,2,3 (One image, 2 DPs, three types of embellies: buttons, ribbon, lace)
Life is good; so is art.
Bonnie
Sunday, March 17, 2013
Eclectic Ellapu ~ To the Moon
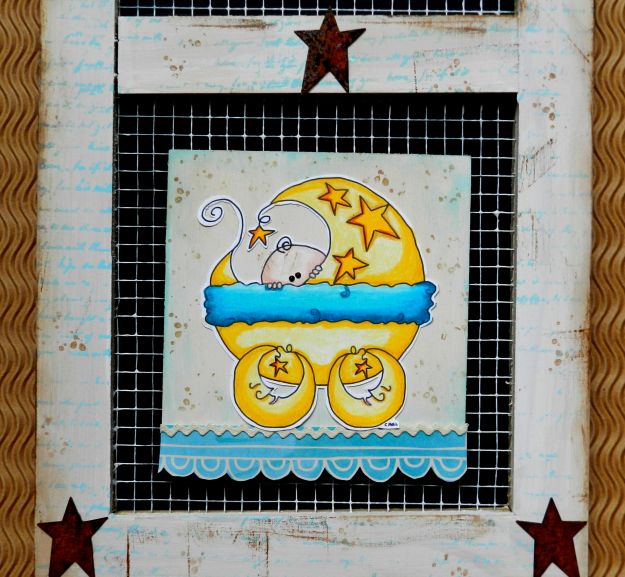
Time for another challenge over at Eclectic Ellapu and this time the Purple Team is playing. It's Elisa's turn to set the challenge and she has chosen the theme of Pregnancy or Baby. I decided to make something suitable for a baby shower or gift. I had this three section wooden wall hanging with a metal hanger attached and thought it would be fun to alter. Each section has chicken wire behind the 4.25" square in the center.
The frame was pickled with watered down gesso so that the wood still showed though. Fresco Finish Mermaid chalk paint was stamped over the whitewashed frame using an Inkadinkado script stamp. Vintage Photo Distress ink was applied around the edge of the frame with an applicator tool and then lightly hit here and there directly from the pad for a more distressed look. The frame itself is fairly rustic so I wanted to emphasize that. My favourite splatter stamp from TH Bitty grunge was stamped around the frame and also on the inset squares. More mermaid paint was dabbed around the edges of the small squares and then spread around with a waterbrush. To complete the frame, rusted metal stars were adhered in the four corners and on the crosspieces between the sections.
These sweet little images come from Tiddly Inks and were printed on white cardstock and coloured with Prismacolor pencils. They were fussy cut leaving a narrow white border around the images and then adhered to the top and bottom squares. The sentiment was computer generated and printed on Amy Tangerine paper. Scalloped borders from the same paper pack were cut out and adhered to the bottom of each square. Baby rick rack was also added to each square for added texture and cute factor :) Before the sentiment piece was adhered to the wood, a moon charm was attached with a star brad. Crinkly seam binding lengths in turquoise and gold were tied around the wire hanger to complete this project.
This was a fun frame to complete and would be equally effective in three simple wooden frames...the inexpensive kind that Michaels carries would work perfectly and make a sweet baby gift. Fun to colour, fun to put together, fun to give...can't beat that. Thanks for dropping by today. I appreciate you taking the time to do that. Thanks also for the encouraging comments. They really make my day. Now pop over to the Eclectic Ellapu blog when you get a minute to see the other wonderful projects created by my Purple teamies. I hope you'll be inspired to play along.
I am entering this project in the following challenges:
One Stop Craft ~ #220 Anything Goes
Hotshot Craft ~ #15 Anything But a Card
Stampin For the Weekend ~ Child's Play
Life is good; so is art.
Bonnie
Saturday, March 16, 2013
I'm in the Moo'd to art
One of the swaps I'm in at Splitcoast is called Moo'd To Art and is being hosted by the wonderful Joyce. We are making Moos which are 1 1/8 x 2 3/4" pieces of art. The idea of these Moos is to come up with a collectiuon of suggestions to use when we are stumped for an idea to use on a project. All of the Moos will be attached to a ring for a quick and pretty reference tool. Fun idea and practical, too.
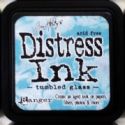
I have made two sets of Moos for this swap. The first one is to add a stencil. The background was done with Tumbled Glass and Broken China Distress inks blended on white cardstock. The TCW reverse chicken wire stencil was applied using Broken China and then Wendy Vecchi Embossing Paste was applied over the TCW Mini Harlequin stencil. The small branch was cut with a die, the flowers with a punch. Half pearls were adhered to the flower centers. Brown and white baker's twine was wrapped around the bottom and a threaded white button was glued at the intersection. The little wooden Recollections bird was sprayed with Dylusions Bubblegum Pink spray ink, shaded with Prisma pencils and given a black half pearl eye.
The back features a Tiddly Inks stamp called For the Birds with Moo handwritten on his paper. The words were computer generated and adhered at wonky angles. The flower is cut with the same punch and again has a pearl center. The doodling and my name/date were written by hand. The second set's back is similar but uses a different bird from the set and the Moo is done on the computer.
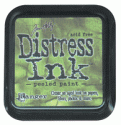
The front of the second set features the suggestion to do Tone on Tone stamping. The background was done with Shabby Shutters and peeled Paint Distress inks blended on white cardstock. The texture stamp is a Penny Black set called Warm Wishes and was stamped using Peeled Paint which also darkened the edges of the Moo. The stamp is another Tiddly Inks stamp called Flower Girl. She was coloured with Prismacolor pencils and fussy cut. The piece she is standing on is part of a rub-on and a threaded button marks the inner edge. The top of the Moo has a scalloped piece and a narrow length of lace attached which I really hope won't interfere with the holes punched for the ring. (Oops!)
Anyway, those are my two little Moos for the swap. I can't wait to see what the others have created...such a fun idea. Thanks for visiting today. I hope your weekend is going well.
Life is good; so is art.
Bonnie
Thursday, March 14, 2013
eP Emerging Mixed Media Spread
As you know if you have been following my recent mixed media adventures (and huge thanks to you for doing so), I started altering a child's board book for the February Get Altered project at eclectic Paperie. Today I am sharing the third double page spread, still following the theme of flight established when I did the cover. For the first two, I used birds so this time I decided to switch it up a little and use one of my new stamp sets.
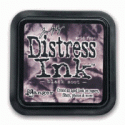
The pages were already gessoed...so glad that I gessoed all them at once. With Golden gel medium, I adhered two large torn pieces of Idea-ology Melange Tissue Wrap, one on each page. Once dry, slightly watered down white gesso was brushed over the top of the tissue wrap to tone it down a little. Then Tumbled Glass, Broken China, and Peeled Paint Distress inks were applied to the entire page in a random fashion, blending where the colours met and overlapped. Water was flicked over the Distress inks to create splash spots (which is fun to say).
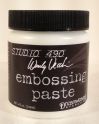
Out came some stencils from my ever-increasing collection. I applied Vintage Photo and Broken China DI over Dylusions Letter Jumble , TCW's Mini Tile Texture, Rustic Paint, and Mini Tri Mosaic stencils. The tree branches were stencilled using the off-cut of the die cut branch. The Penny Black Winter Berries stamp was applied to the branch ends with Peeled Paint. Wendy Vecchi's White embossing paste was applied with a palette knife through the Dylusions Chequered Dots stencil and allowed to dry thoroughly.
The branch was die cut from the Graphic 45's A Ladies' Diary love letters page, inked with Vintage Photo DI, and adhered to the spread. A Faber-Castell Big Brush pen outlined it on the page, using my finger to smudge as I went along. A Sepia Micron pen outlined the branches on the patterned paper. Pan Pastel coloured the embossing paste and Faded Jeans Distress Marker was applied to the edges and walked out with a water brush. An Internet chrysalis (cocoon) image was printed twice and fussy cut. The top layer was pooched up using styluses and then popped up on the bottom layer with foam dots in the center only. Faded Jeans DI was applied around the edge and Glossy Accents was brushed over the top for shine. A layer of cheesecloth was adhered under the chrysalis before it was "hung" from the branch.
To add to my theme and the texture in the background, Hero Arts letters were combined to stamp the word "Change" repeatedly with Vintage Photo DI. The leaves from the Dylusions Luscious Leaves stencil were inked near the branches using Peeled Paint DI and outlined with Distress marker.
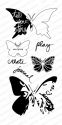
While things were drying, three butterflies from Julie Fei-Fan Balzer's Butterfly stamp set were stamped onto watercolour paper. I was not looking for perfect images (which is tricky with cold press watercolour paper because of the uneven texture). Scattered Straw, Spiced Marmalade, Barn Door, and Dusty Concord Distress inks were smushed onto my craft sheet and then applied to the butterflies using a waterbrush. Love that imperfect blended look. They were fussy cut and edged with Black Soot DI and marker on the edges. White acrylic paint dots were added for more interest. Two of them were given pink wire antennae.
A ticket shape was handcut from white cardstock and colorized with the same three distress inks. The sentiment from Donna Downey's Empowered Words collection was stamped in the center. After the ticket was adhered it was doodled on and around to embed it into the background.
A section of vintage lace from my stash was adhered next to the large butterfly. Tissue tape was inked and adhered in a few places for more texture, as were drywall tape bits.
To bring more black to the left side, an Idea-ology flash card was torn, had Black Soot stain applied to the top and then water sprayed over that. The left side of the B card was inked with the three warm Distress ink colours. The card was stapled, adhered to the page, and outlined with the FC Big Brush pen. More doodling with this pen and the smaller Micron helped add pattern and pull the pages together. Words (fly, beginning, chrysalis, new, becoming) were hand printed here and there and then blended into the background with the old white gesso on the finger (tap, tap) trick ;)
The finishing touches were to add a piece of the torn holes from the watercolour paper onto the page, ink it, and stamp the word change over it; to water down some white gesso to make lid rings; to date stamp the spread; and to stamp the dotty pattern using Vintage Photo and a TH Bitty Grunge stamp. Peacock Feathers and Salty Ocean Distress inks were used to darken the edges of the pages.
The photos below show the top left and bottom right corners of the spread...and serve as a little eye-candy reward if you made it this far :)
Although I use a lot of product and steps when I am doing mixed media, it is not necessary, especially if you are just starting to experiment with this art form. When I had less, I used less so please don't feel that you don't have enough "stuff" to do this. Use what you have and add as much or as little as you like. That's part of the fun and adventure...no rules, just play.
Thanks for visiting with me today. It's always a treat for me when you stop by. If you are curious about some of the products I have used, click on the thumbnails below to go directly to the catalogue item at the eclectic Paperie shop. As for me, I'm going to clean up so I can start all over again. Can't wait!
Life is good; so is art.
Bonnie
Wednesday, March 13, 2013
Stamp N Plus Hopin' For Spring
Happy Wednesday! Usually around this time in March, I'm eagerly looking everywhere for signs of spring. I don't mind winter but by this point, I am tired of winter clothes, boots, even drying my clothes inside. For this week's post, I decided to do a tribute to spring...and tulips, although we are a long way from that. We used to live in Ottawa for years and years and Ottawa, which happens to be Canada's capitol, has a wonderful tulip festival each year. The thousands and thousands of tulips are beautiful so tulips hold a special place in my heart.
I stamped the Stamp N Plus Scrap N large Tulip 2 image three times with Memento Tuxedo Black ink and coloured them with my Prismacolor pencils before fussy cutting them. The background was made from a raid on my scrapbox which is full to bursting. I blame the elves who also hide things on me during the night. The dotted paper is a rectangle as is the blue band over top. The scallops were adhered to the top and bottom of the dotty paper. They were cut off of scallopy-edged cardstock. The beads which spell Spring came from my stash... either Dollar Store or Michaels. Inking around the edge of the background paper was done with Vintage Photo DI before it was adhered to a 4 x 5.5" cream card.
Just a simple little card to encourage Spring to come to stay. No more of this "just passing through" stuff and then back to snow and cold! Thanks for visiting today. That's always something cheerful I look forward to.
Life is good; so is art.
Bonnie
Subscribe to:
Posts (Atom)