Showing posts with label Christmas. Show all posts

Tuesday, December 24, 2019

So Very Merry card ~ inspired by a Vera Lane Studio image


Hi everyone! I am posting my very last Christmas card for 2019 today. It's a little one (only 3.5 x 4.5 inches) just big enough to accommodate the sweet little image called Treena by Vera Lane Studio. She is one of two images plus a sentiment from the set. She is so cute I want to hug her!


Treena was coloured with Prismacolor and Polychromos pencils, fussy cut leaving a narrow white border, and then matted with black cardstock to give that second narrow border. She was popped up on foam tape to create dimension and shadow.


The background was a rectangle of plaid paper matted with black cardstock. A strip of washi tape was used to ground her and faux stitching created a border using black pen. The sentiment from the digi set was printed onto white cardstock, matted with black. Once it was adhered to the top right corner, two enamel holly stickers and a berry were added, overlapping the sentiment and the plaid background.

What a sweet and simple card to create! Thanks for joining Treena and me today. We both want to wish you a Merry Christmas or a happy holiday depending upon what you celebrate. Be sure to pop by the Vera Lane Studio Etsy shop and the VLS Facebook group when you get a minute. There is a lot of inspiration and more than a few must-haves to discover :)

Life is good; so is art.
Bonnie

Tuesday, December 17, 2019

Ugly Sweater Tags ~ inspired by Vera Lane Studio images


Hi everyone! I wanted to create some cute little gift tags to attach to presents and, more importantly, I wanted to colour 4 of Lulu's Ugly Christmas Sweaters by Vera Lane Studio because each one makes me smile. The tags are about 2.5 x 3.75 inches and are a great way to use up scraps of patterned paper. The girls were coloured with Prismacolor and Polychromos pencils, fussy cut leaving a white border and again leaving a black border. They were popped up on foam tape to add dimension.


The backgrounds were cut into a tag shape, matted with black cardstock, and faux stitched around the edges. Black reinforcements were punched and adhered to the holes in the tags. Lengths of washi tape or a strip of patterned paper were adhered across the bottom of the tags to ground the images. Gold circle embellies were adhered to both ends of the contrasting strips. To finish these super simple tags, white satin ribbon was added as a topper to each one. The to/from will be added to the back with white pen.

Thanks for joining the Sweater Girls and me today. We're so glad you did. Be sure to pop by the Vera Lane Studio Etsy shop and the Vera Lane Studio Facebook group when you get a chance. Both are great places to hang out and are chalk full of inspiration!

Life is good; so is art.
Bonnie

Tuesday, December 03, 2019

Poor Rudolf ~ inspired by a Vera Lane Studio digi set


Hi everyone! I have a quick post sharing a fun Christmas card I made with one of the images from the Rudolf digi set by Vera Lane Studio. They are the cutest reindeer with 3 different poses and the loveliest big noses.


I coloured Rudolf with a mix of Prismacolor, Polychromos, and Caran D'ache pencils. He was then fussy cut, leaving a narrow white border. Once matted to black cardstock, Rudy was fussy cut a second time leaving a narrow black border. This helps him stand out against the plaid background. Rudy was popped up on foam tape to give him dimension.


The plaid paper was matted with black cardstock which was cut slightly smaller than the black so it framed the plaid. This was adhered to the white card base which added a white border to the black. Three enamel berries and two holly leaves were glued to the upper right corner.


The saying was printed onto white cardstock, cut into sections, and matted with black. The wording was then popped up on foam tape to create a natural shadow. To ground Rudolf, although he wants to remind you that he can fly, a piece of washi tape was adhered to white cardstock and glued between the wording and Rudy.

Thanks for popping by to visit with Rudy and me. I hope you get a chance to stop by the Vera Lane Studio Etsy shop and our VLS Facebook group. There's lots to see both places :)

Life is good; so is art.
Bonnie

Tuesday, November 19, 2019

Christmas Tags using Vera Lane Studio Holiday Collage Sheet


Hi everyone! My second DT project today is a set of 6 Christmas tags created with the Vera Lane Studio Holiday Collage Sheet images. These are such quick tags to create because the images are pre-coloured and need only to be fussy cut and details added if desired.The tags were cut from mop-up or gel printed paper scraps using a Paper Smooches tag die.


Stamping was added to each background to add more texture and interest. All of the tags had washi tape added to the bottom of the tags to ground the images. A simple doodled border was added to the outside edges of the tag and the washi was outlined as well.


The images were fussy cut leaving a white border and matted with black cardstock. Detail was added  using Stickles, black pen, and paint pen dots as well as a tiny embroidery floss bow, and punched hearts for the cups. To finish the tags, they were each matted with black cardstock and a thin satin ribbon was added to the tops.

Thanks for stopping by today. I hope this has given you some quick and easy ideas for your own gift tags. I'd love to see what you create! Be sure to show them on the Vera Lane Facebook group so we can all be inspired.

Life is good; so is art.
Bonnie

Merry Kiss-mas card - inspired by a Vera Lane Studio image


Hi everyone! It's Tuesday and that means it's my turn to post my DT projects for Vera Lane Studio. My first project is a Christmas card starring the couple from the image released last Wednesday called The Kiss. The set also comes with a sweet cat who had another appointment and isn't on this card...LOL.


I coloured the images with Prismacolor and Polychromos pencils. They were fussy cut leaving a narrow white border, matted to black cardstock, and then fussy cut leaving a narrow black border. Foam tape was used to pop them up and create natural shadow.


The background was a rectangle of Christmas cardstock, with a narrow contrasting strip at the bottom to ground the two. This was matted with black cardstock so it would stand out from the white card base. The wording was printed onto white cardstock, matted with black, and popped up with foam tape. To finish the design, a pair of kissy lips were punched from red cardstock, and coloured with Prismacolor pencils. It was then matted with the same punched image cut from black and offset. The lips were then adhered to a circle punched from sparkly white cardstock, matted with black, and popped up on foam squares  so it would be higher than the images and sentiment.

Thanks for joining us today. That was so nice of you. Be sure to stop by the Vera Lane Studio Etsy shop to check out The Kiss and all of the other fabulous image sets. And while you're out and about, pop by our Vera Lane Studio Facebook group where there is daily inspiration with projects from our design team and our wonderful group members. It's an awesome place to hang out!

Life is good; so is art.
Bonnie

Thursday, December 15, 2016

Santa says....


Hi everyone! The other day I stopped by Sassy Cheryl's Stamps to check out Cheryl's retiring stamps and a whole bunch of retiring and not-retiring stamps fell into my cart. I had a lovely time browsing her images which I hadn't coloured for quite a while (no idea why!) and fell in love with her style all over again.The image I coloured for this Christmas card is called Better Not Pout. Is he not the cutest with that little wink and big ol' stache?


I coloured Santa with a mix of Polychromos and Prismacolor pencils. He was fussy cut leaving my usual white border. He was then matted with black card stock and fussy cut leaving a narrow black border to help him stand out against the background. Foam tape was used to pop him up and create a natural shadow.


A layered frame was cut out from designer paper and dark red coloured pencil was used to shade on the red next to the green. A black mat was cut slightly larger than the red rectangle and the red/green frame was adhered to it. A small rectangle of Christmas music designer paper was cut to fit inside the frame opening while still leaving some black showing. The entire stack was then adhered to a white card base. Small white buttons threaded with red were added to each green corner. The sentiment was stamped on white, die cut and matted with red card stock. The inside of the open letters were coloured with green marker and the edge of the label was faux stitched with black to repeat the stitching on the green layer.

Thanks for stopping by today. Santa will be moving you to the good list now...LOL Stay tuned for more projects with these sweet images. I see an altered children's board book in my future ;)

Life is good; so is art.
Bonnie


Monday, December 12, 2016

1231 Old Lady Kissing Santa ~ a Sandra Caldwell New Release


Hi everyone! It's New Release Monday at Sandra Caldwell's Etsy shop and you know what that means...all kinds of fabulous new images and wonderful DT projects on the Sandra Caldwell Stamp Fans Facebook group. This week I was able to play with and image starring one of my favourite characters Old Lady. I just love the mischief she gets up to as well as her fabulous feisty attitude. This one is called 1231 Old Lady Kissing Santa. The expressions on both of their faces cracks me up. She seems far more enthusiastic than he does :)


I coloured them with a mix of Prismacolor and Polychromos pencils. The image was fussy cut leaving a narrow white border but I didn't need to mat the image with black since the background was going to be that colour. Yay! Saved a step!


I once again used designer paper with a frame that looked like two layers. I am almost out of that paper now. I used a craft knife to cut out the center of the paper and cut a piece of black card stock slightly larger than the opening. The red layer was edged with Black Big Brush pen and then shaded next to the green with coloured pencil. The green layer was faux stitched next to the red part. Before the black was adhered behind the opening, black and white checked washi tape adhered to white card stock to take away the transparency was adhered to the top and bottom of the opening. That allowed the top of the mistletoe to "hang" from it.


The sentiment was one that came to me when my sister and I were talking about Vegas. I switched it up to suit being under the mistletoe. It was printed on white card stock and trimmed close to the words. To finish off the card, small hearts were punched from red card stock and adhered above the couples' heads and either side of the bottom section of the sentiment. Red Stickles was added to all of the hearts for a little festive sparkle.

Thanks for joining Old Lady, Santa, and me today. We all appreciate that you took the time to do that. When you get a minute, be sure and pop by the Sandra Caldwell Stamp Fans Facebook group where our talented DT will be posting their makes throughout the day.  Steal some time to stop by Sandra's Etsy shop, Babycakes Digis and Designs, to browse through all of her awesome images. She still has a great sale going but only until the 15th so don't procrastinate :)

Life is good; so is art.
Bonnie

Monday, December 05, 2016

1214 Snowbird Nap ~ a Sandra Caldwell new release


Hi everyone! It's New Release Monday at Sandra Caldwell's Etsy shop and you know what that means...all kinds of fabulous new images and wonderful DT projects on the Sandra Caldwell Stamp Fans Facebook group. This week I played with a sweet image called 1214 Snowbird Nap and guess what...after 2+ weeks of rain every single day, we woke up to snow this morning. Yay! Snow is much prettier than rain and at least the birds come to the feeders with snow.


I coloured these little guys with a mix of Prismacolor and Polychromos pencils using vibrant colours to make them pop.I love their sweet faces and cozy hats. They were fussy cut around the top and left side leaving a narrow white border for contrast against the background.


The white card base was stacked with layers of pattern and colour. The black background was cut smaller than the white base. The red and yellow frames were centered over the black and faux stitched along the inside edge of the red. The image was placed inside the frame opening and then black and white striped washi tape, which had been adhered to white card stock, was used to fill in between the red frame and the image. I love the playfulness this adds to the design.


The sentiment was printed on white card stock, trimmed close to the letters, and edged with black Big Brush Pen. Foam tape was used to pop it up. White die cut snowflakes were added along the top of the card as well as either side of the sentiment to finish the card.

Thanks for stopping by today. Before you settle in for a long winter's nap, be sure and pop by the Sandra Caldwell Stamp Fans Facebook group where our talented DT will be posting their makes throughout the day.  Steal some time to stop by Sandra's Etsy shop, Babycakes Digis and Designs, to browse through all of her awesome images. You are sure to smile, to find inspiration and Must-Haves there. I know I always do!

Life is good; so is art.
Bonnie

Monday, November 28, 2016

1206 Whip Cream Christmas ~ A Sandra Caldwell New Release


Hi everyone. This is my second post for today and I am sharing my second card created with my second New Release image from Sandra Caldwell. That's a lot of seconds...LOL. I hope you didn't do that at Thanksgiving dinner :) Today is another New Release Monday at Sandra Caldwell's Etsy shop, Babycakes Digis and Designs and that means a lovely collection of new images posted to the shop and wonderful DT projects on Sandra's Facebook group featuring those stamps. This week I was lucky enough to be able to play with two images. The one I am featuring in this post is called 1206 Whip Cream Christmas. Yum!


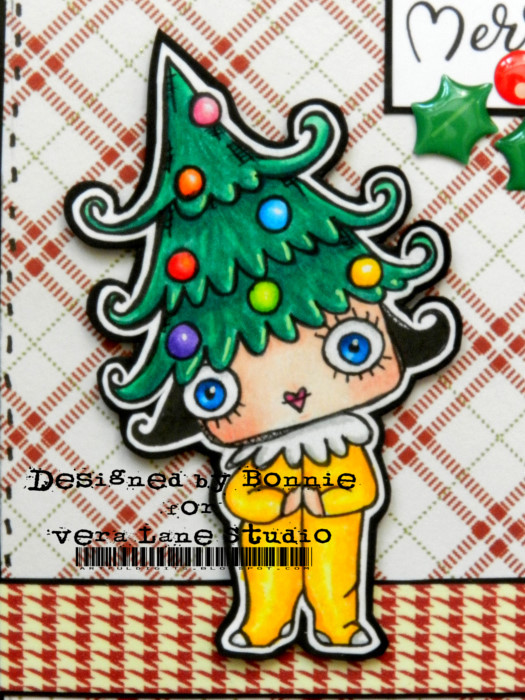
The image was coloured with a mix of Prismacolor and Polychromos pencils. Black pen was used to create the grain of the wood, and white paint pen created the white dots on the napkin. The dots on the cupcake icing were made with Red and Green Stickles which catch the light. Icicle Stickles were added to the star on top for more sparkle. The image was fussy cut leaving a narrow white border and once again I matted it with black and fussy cut again, not knowing that I was putting black behind the image. Foam tape was used to pop the image up.


I created this card in a similar fashion to my earlier card only this time there is no black mat around the frame. I cut a frame from red checked pattern paper slightly smaller than the white card base so that 1/8 inch of white would peek out. The frame was faux stitched on both the inside and outside edges with a black pen. A rectangle of yellow dotty paper was cut slightly larger than the frame opening and adhered to the back of the frame before both parts were adhered to the white base. A rectangle of black card stock big enough to fit the image was cut and embossed with a snowflake folder. The flakes were dry brushed with white acrylic paint to highlight the raised areas before being adhered to the yellow paper. The image then went on top.


The sentiment was printed onto white card stock, matted with black, and popped up with foam tape. It was placed where the frame and the inset piece meet along the bottom to bridge the two. Stars were punched from the same yellow dotty paper and matted with black card stock. They were then adhered in each of the four corners.

Thanks for stopping by today. I hope I didn't make you too hungry with this whipped cream topped cupcake.To see the rest of this week's fabulous new images from Sandra, be sure and pop by the Sandra Caldwell Stamp Fans Facebook group where our talented DT will be posting their makes throughout the day.  Steal some time to stop by Sandra's Etsy shop, Babycakes Digis and Designs, to browse through all of her awesome images. You are sure to smile and to find inspiration and Must-Haves there. I know I always do!

Life is good; so is art.
Bonnie

1200 Present For Me ~ A Sandra Caldwell New Release


Hi everyone! Today is New Release Monday at Sandra Caldwell's Etsy shop, Babycakes Digis and Designs and that means a lovely collection of new images posted to the shop and wonderful DT projects on Sandra's Facebook group featuring those stamps. This week I was lucky enough to be able to play with two images. The one I am featuring in this post is called 1200 Present For Me and she is a cutie!


I coloured her with a mix of Prismacolor and Polychromos pencils and fussy cut her leaving a narrow white border. At the time, I didn't know I was going to place her on a black background so I adhered her to black card stock and fussy cut her again leaving a narrow black border. It was a step I could have skipped but I don't mind fussy cutting so no big whoop:) Foam tape was placed on the back of the image to pop her up.


The background began with a white card base to which I adhered a black card stock mat leaving 1/8 inch of the white still showing. From yellow plaid patterned paper, I cut a frame 1/8 inch smaller than the black mat and about 3/4 inch in width. Faux stitching was doodled around the outside edges of the frame with black ink. Another rectangle of black was cut slightly larger than the frame opening and embossed with a swirly folder. This piece was then adhered behind the opening and the lovely lady was centered inside. It gives great texture and movement to the background without detracting from the frame pattern or image.


The sentiment from Create With TLC was printed onto white card stock and die cut into an oval shape. It was then matted with green card stock and the white edges were faux stitched with pen before it was adhered under the image. A wooden stocking embellie was glittered with Icicle Stickles on the star and also the wee snowflake which I added. It was then adhered to the top left corner and balanced by three threaded black buttons in the bottom right corner.

Thanks for joining my "gifted" friend and me today. We appreciate that. When you get a chance, be sure to pop by both Sandra's Facebook group, where the fabulous DT projects will be displayed, and also stop by Sandra's Etsy shop. Not only will these images be posted later today but there is a huge selection of other fabulous images there which are sure to catch your fancy. It's a wonderful place to browse and get inspired.

Life is good; so is art.
Bonnie

Wednesday, November 23, 2016

Chill Out ~ Inspired by a Sandra Caldwell image


Hi everyone! Today I have another Christmas card featuring one of Sandra Caldwell's delightful snowmen. This guy is called 64 Snow Guy and I just love him to bits. It could be the look on his face, It might be his slouchy top hat or his dapper vest...or it could be every single detail :)


I coloured Snow Guy with a mix of Prismacolor and Polychromos pencils before fussy cutting him leaving my usual white border. He was matted with black card stock and fussy cut again. Foam tape was attached to the back of him to pop him up from the background.


Two designer papers were cut on the diagonal to fit the black mat which was slightly smaller than the white card base. This left a black border around the edges as well as one separating the two papers. Tiny white die cut snowflakes were adhered along that center black dividing line. Black faux stitching was doodled around the outside edges of the paper.


The sentiment was printed onto white card stock and cut into two sections. Both were matted with black card stock and adhered flat to the card front above and below Snow Guy. Red enamel holly berries were used to fill in the O in each section and then holly leaves were adhered sprouting from the berries.

Thanks for visiting Snow Guy and me today. We hope you find time to take his advice over the next 6 weeks.  It's sometimes a challenge to remember to take some down time when the holidays are approaching. To see more of Sandra Caldwell's sweet snowmen, as well as her other fabulous images for all or no occasions, be sure to visit her Etsy shop. There is a feast for the eyes there!

Life is good; so is art.
Bonnie

Monday, November 21, 2016

Sandra Caldwell New Release ~ 1196 Reindeer Games


Hi everyone! It's New Release Monday at Sandra Caldwell's Etsy shop, Babycakes Digis and Designs. On Mondays, Sandra's DT members post projects created featuring many of the new images both on their personal blogs and on the Sandra Caldwell Stamps Fans Facebook group. Today, I have a Christmas card featuring a newbie called 1196 Reindeer Games.


I coloured this image with a mix of Prismacolor and Polychromos pencils. The image was then fussy cut leaving a narrow white border and then matted with black card stock. It was trimmed out again leaving a narrow black border and then popped up on foam tape to create dimension and natural shadows.


A black mat slightly smaller than the 5 x 7 white card base was adhered to the front. A rectangle of black and white dotty designer paper cut slightly smaller than the black mat was adhered over that. A zig zag pattern was cut from another designer paper to form a horizontal band which was adhered behind where the image would go. Because I thought it looked like Santa and Rudolph were trying to raise the ornament to hang, I created a tree branch with a die cut and greenery with a punch to give them somewhere to aim for. Small amber coloured rhinestones were also adhered to the bough. The sentiment, which seemed to summarize the orders issued by Mrs. Claus, was printed on white card stock and the words were cut apart. They were matted with black card stock and adhered flat to the card.

Thanks for visiting Santa, Rudolph, and me today. We all love that! When you get a chance, be sure to pop by both Sandra's Facebook group where the fabulous DT projects will be displayed, and also Sandra's Etsy shop. Not only will these images be posted later today but there is a plethora of other fabulous images there which are sure to catch your fancy. It's a wonderful place to browse and get inspired.

Life is good; so is art.
Bonnie

Saturday, November 19, 2016

What Candy Canes? ~ Sandra Caldwell New Release


Hi everyone! The other day, Sandra Caldwell had a contest on her Facebook group looking for Candy Cane image suggestions. If she chose one of our ideas to illustrate, we would get that digi first. I suggested a big haired woman with candy canes sticking out of it and she not only chose it but nailed it! How absolutely cute is this image called 1249 What Candy Canes?


I just had to colour her up right away using Prismacolor and Polychromos pencils. She was fussy cut leaving a narrow white border and then matted with black card stock. After trimming her out leaving a narrow black border, foam tape was added to the back of the image. I just love her sweet expression!


A black card stock mat was cut to fit just inside the 5 x 6 inch white card base. A rectangle of black and white checked patterned paper was cut to leave an eighth of an inch border of the black mat showing. The Keep Calm sign, a free download from the Internet, was printed on white card stock and then matted with black. Wide dotty washi tape was adhered to white card stock and cut into three fishtail flags which were adhered on the top and left side. White die cut snowflakes adhered offset to black ones were used to embellish the flags. White flat pearls were added to the snowflake centers. To finish off the card, a black doodled border was added to the outside of the patterned paper.

Thanks for popping by today. My little candy cane friend and I appreciate that. To see more of Sandra's awesome images, be sure to visit her Etsy shop, Babycakes Digis and Designs. There is an absolute ton of fabulous images which are sure to inspire you and call your name :)

Tuesday, November 08, 2016

Angel Kisses ~ inspired by a Sandra Caldwell image


Hi everyone! It's no secret to anyone who knows me that I love snowmen. Creating with them gives me the biggest grin. Sandra Caldwell has such sweet snowmen in her Etsy shop, Babycakes DND, that I decided to have a play with some this week. Today I am sharing the first card I made starring  89 Snow Stuffed. Isn't he just the cutest? I love the wee bird in his hat.


Snow Stuffed was coloured with Prismacolor and Polychromos pencils. He was then fussy cut leaving my usual narrow white border. Once he was adhered to black card stock, he was fussy cut again leaving a narrow black border. These two borders give him a bit of a frame and help him contrast with the background. He was then popped up on foam tape.


The card started with a white card base. A rectangle of MME Comfort & Joy designer paper was cut to fit just inside that base so that about 1/8 inch of white still shows once the black mat was adhered to the dotty paper. Another pattern from the same paper pad was cut into a band and matted with black card stock before being adhered behind Snow Stuffed. Snowflakes cut with a Lawn Fawn die from white card stock were adhered in the upper right corner.


The sentiment was printed on white card stock and cut into two sections. These were matted with black and popped up on foam tape. Another die cut snowflake was adhered next to the bottom section of words in order to bring the snowflake detail to the bottom of the card. This helps the eye move through the card and adds unity to the design.

Thanks for joining Snow Stuffed and me today. You've made us both so happy...he melted a little...LOL To see more of Sandra's fabulous designs and check out her other sweet snow guys, be sure to pop by her Etsy shop. Grab a hot beverage and a little snack first...there's lots to see :)

Life is good; so is art.
Bonnie

Monday, November 07, 2016

Sandra Caldwell New Release ~ 1128 Grandma's Little Elf


Hi everyone. Today I have two new releases from Sandra Caldwell because she very kindly gave us last Monday (Halloween) off. The first one I am sharing is this adorable one called 1128 Grandma's Little Elf. I absolutely adore the look on her face so I chose to create a Christmas card with her. I coloured her with a mix of Prismacolor and Polychromos pencils. She was then fussy cut leaving a narrow white border. Once she was adhered to black card stock, she was fussy cut again leaving a narrow black border. I like how the white and black frame the image and help it contrast with the background. I also like the fact that Sandra's signature linework becomes wider and therefore stronger with each border added. I don't want to lose those skinny bits because they are an integral part of Sandra's style and design. Foam tape was added to the back of the image to pop it up and create a natural shadow.


I kept the background simple on this one which I often do on a card to allow the image to take center stage. The card base was white so a rectangle of designer paper was cut to fit inside the base leaving a white border and enough room to mat the green with black card stock. Another piece of designer paper was trimmed out to emphasize the strips of pattern and make an interesting staggered shape. This was also matted with black before it was adhered to the upper left corner of the card. Four black enamel dots were adhered across the top.


The sentiment was printed onto white card stock and then every other letter was coloured in red or green using fine markers. The sentiment was cut into two segments which were each matted with black to make them pop. Faux stitching was doodled around the outside edge of the green background and black Big Brush pen was used to edge it and hide the white edge of the designer paper.

Thanks for joining Grandma's Little Elf and me today. We are delighted you did that. She will be available in Sandra Caldwell's Etsy shop, Babycakes DND, later on today. While you are there, check out the many other fabulous images which she has. I always find lots of Must-Haves and look forward to my Monday visits there. We would love to see your Sandra Caldwell creations posted in our Sandra Caldwell Stamp Fans Facebook page. If you tune in later today, all of the other awesome  DT makes with the new releases for this week will be posted there for all of us to enjoy :)

Life is good; so is art.
Bonnie